Monthly Projects
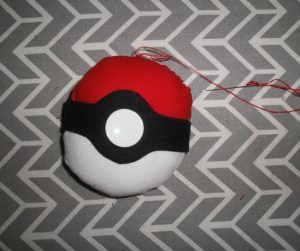
May 2017: Pokeball Pin Cushion
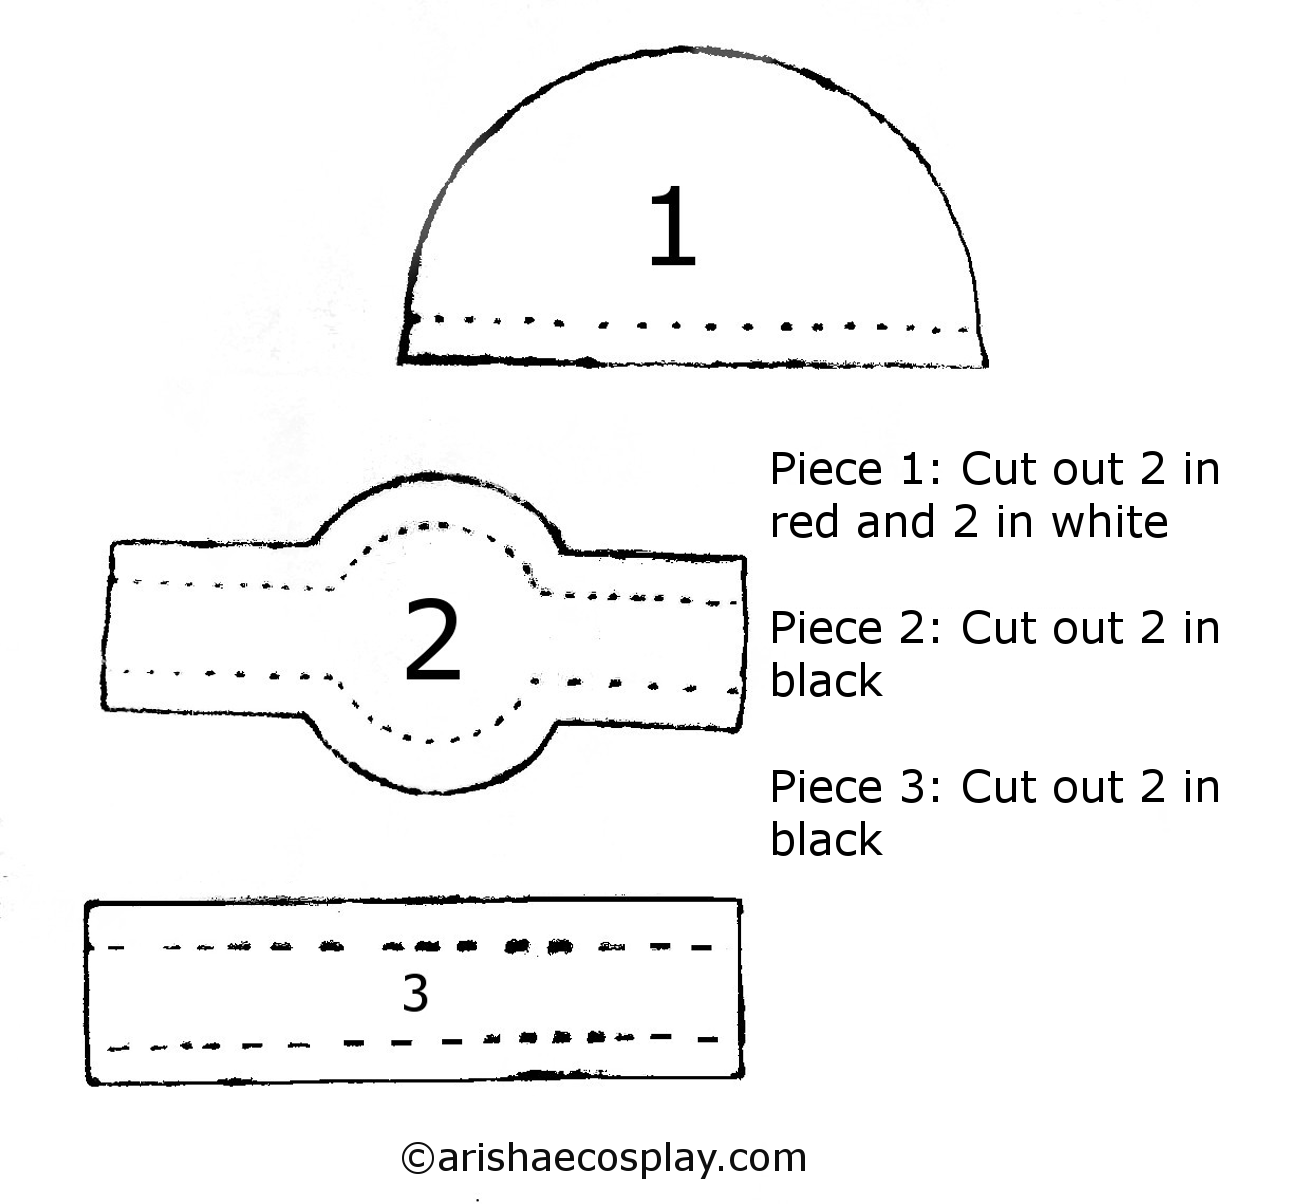
Download the pattern here.
Step 1
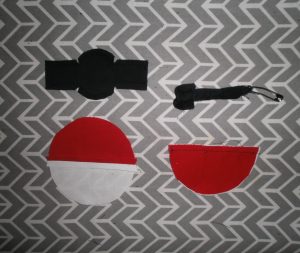 Sew each white piece to each red piece along the center sew line.
Press the seams open.
Sew the black pieces along the dotted lines on the pattern.
This entire project, everything gets sewn right sides together and seams are 1/4 inch.
Flip the black pieces so they are right side out, use a safety pin to help flip them
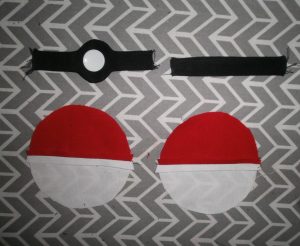
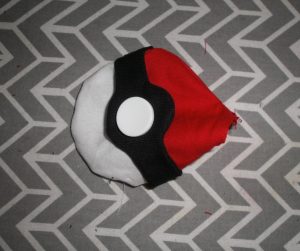
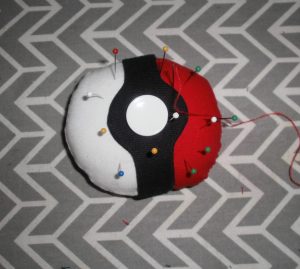
Iron everything flat and add a white button as shown. The button in our pin cushion is hand sewn on.

Place one black piece over each of the red and white pieces. Then sandwich them right sides together.
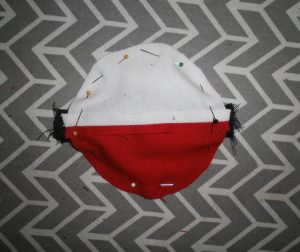 Pin and sew, leaving an opening near the bottom.
Step 5
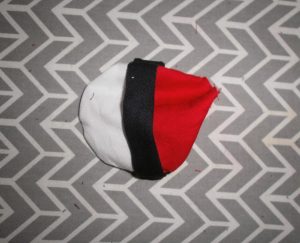
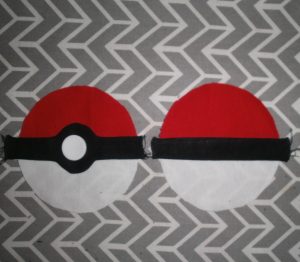
 Flip right side out through the opening. We now have one black piece to each side.
Step 6
 Stuff! We used polyester fiberfill (polyfil) to fill ours but feel free to use alternative stuffing.
Step 7
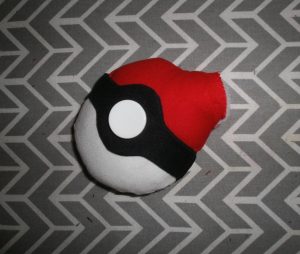
 Hand sew the opening closed.
 We have our pin cushion. You can also use the same methods to make one in a larger size for a pillow.
June 2017: Sailor Moon Bow!
Step 1
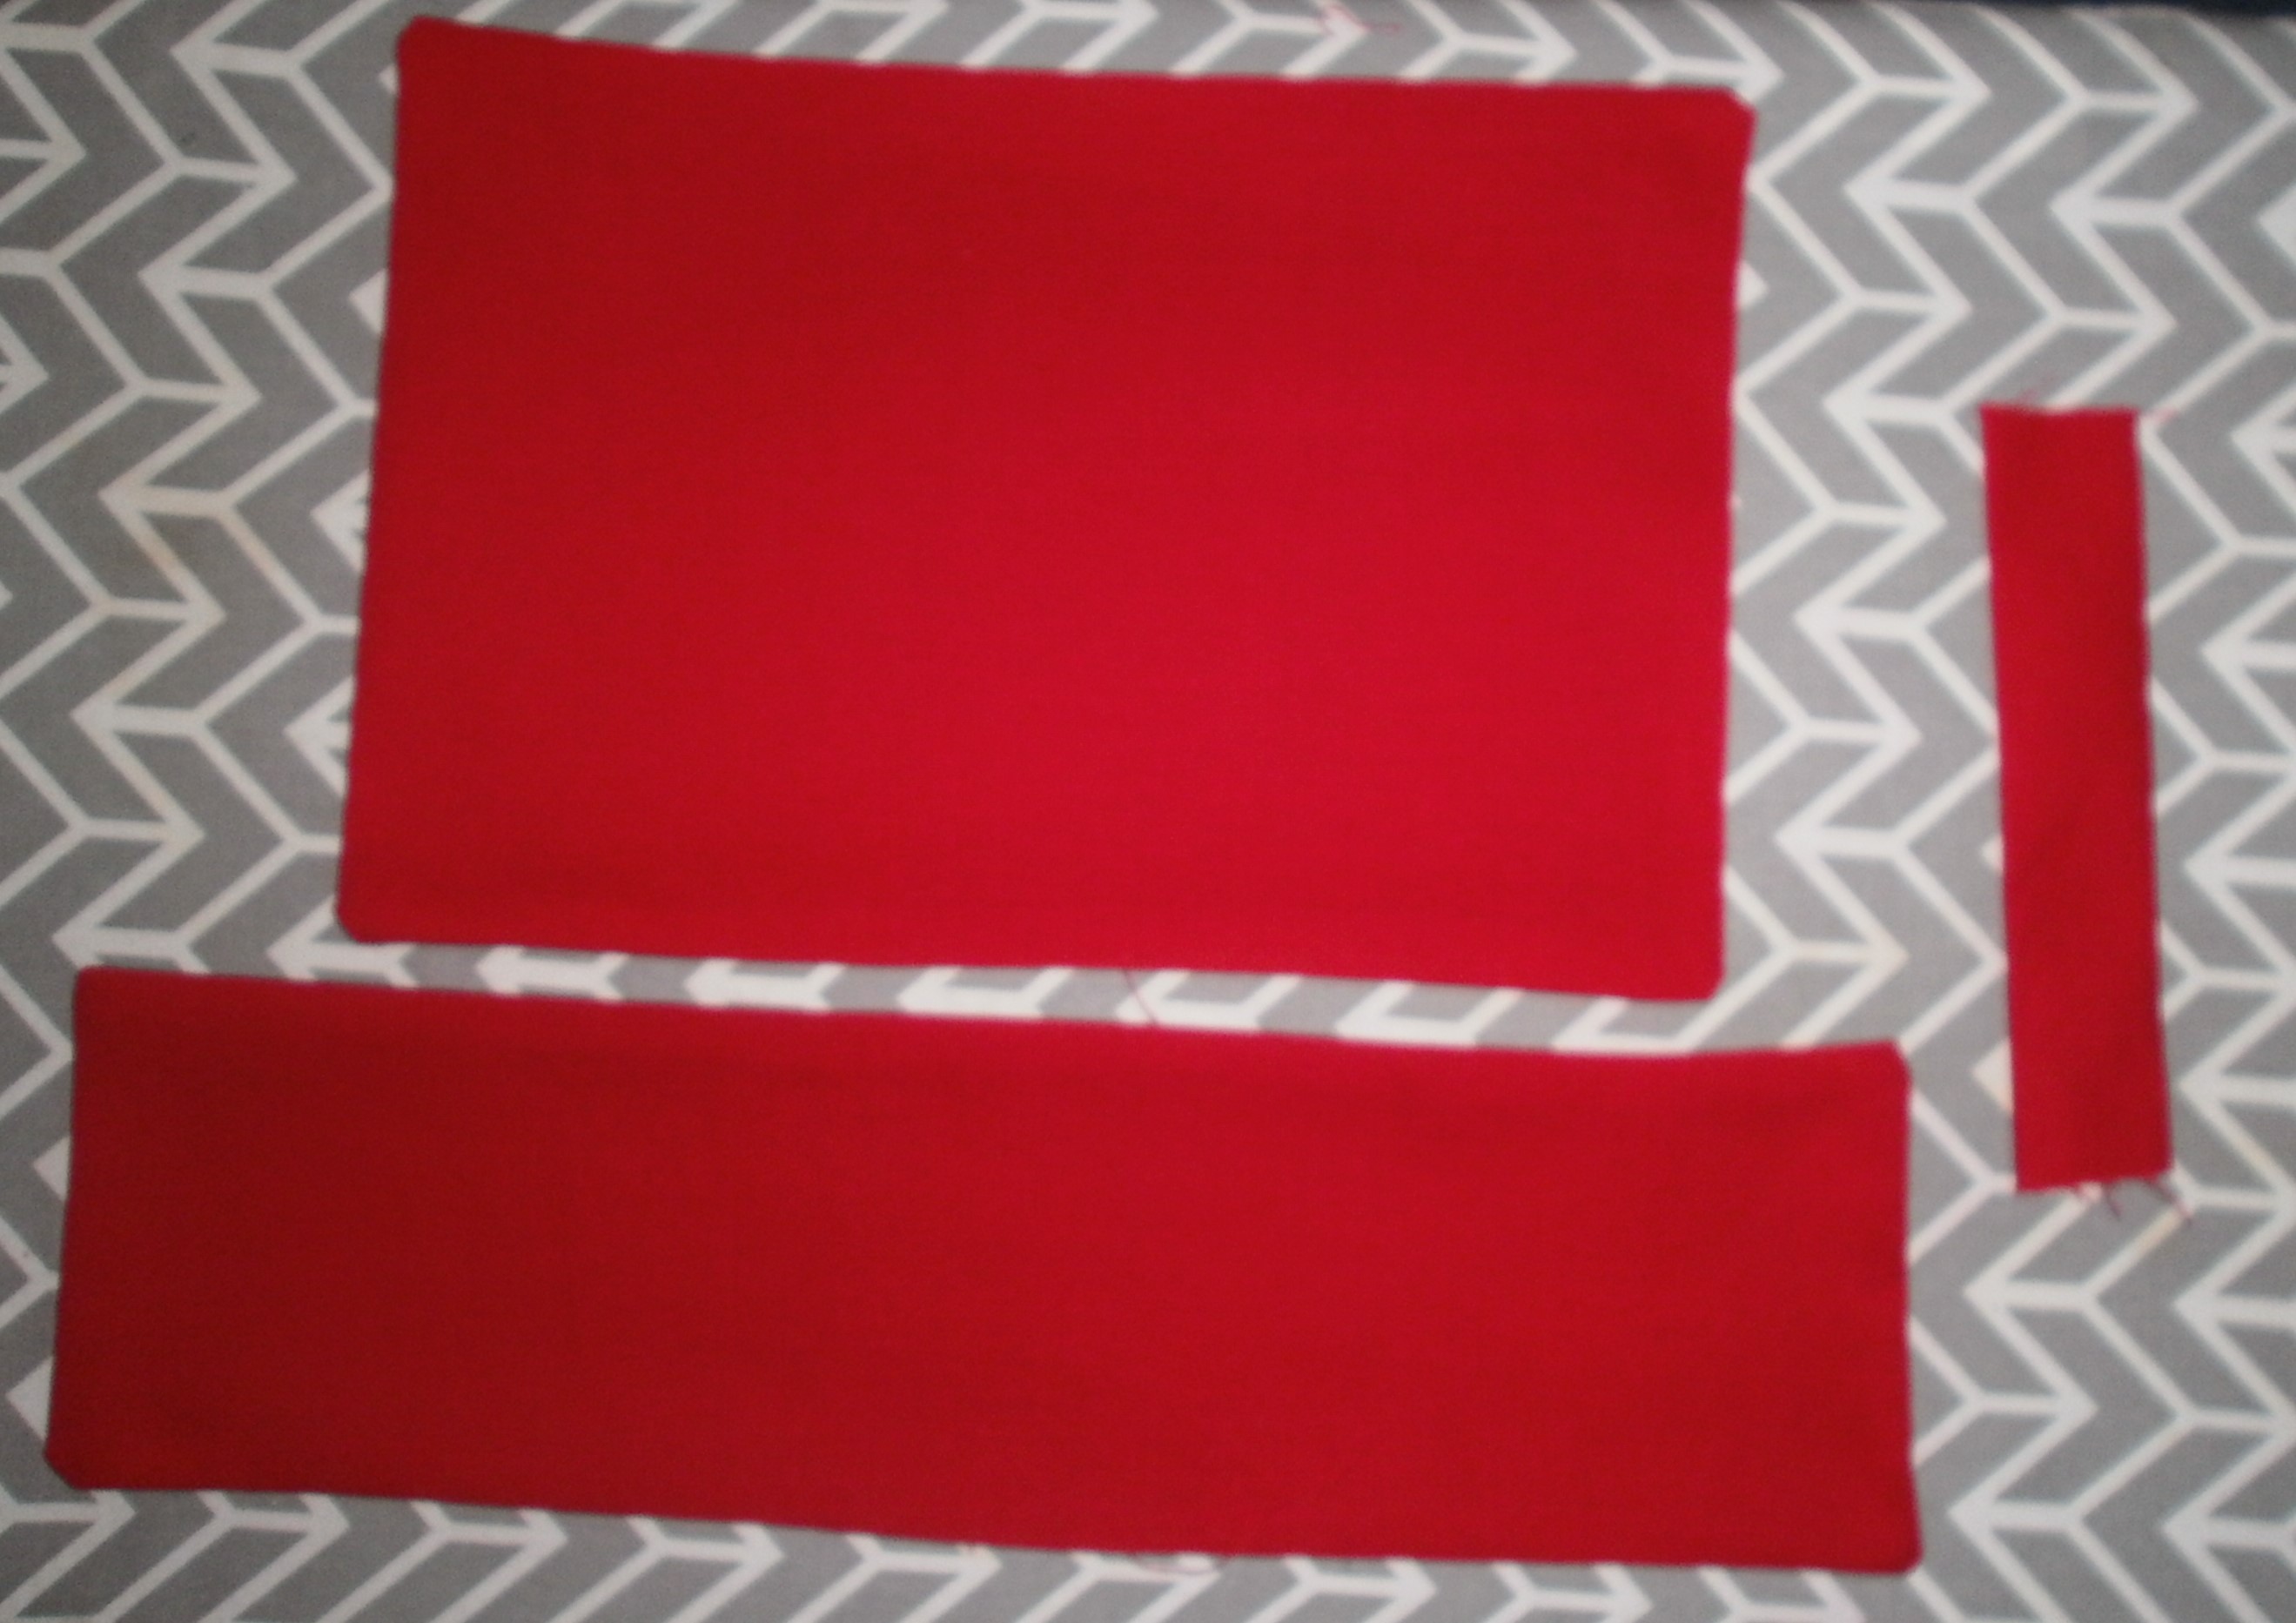
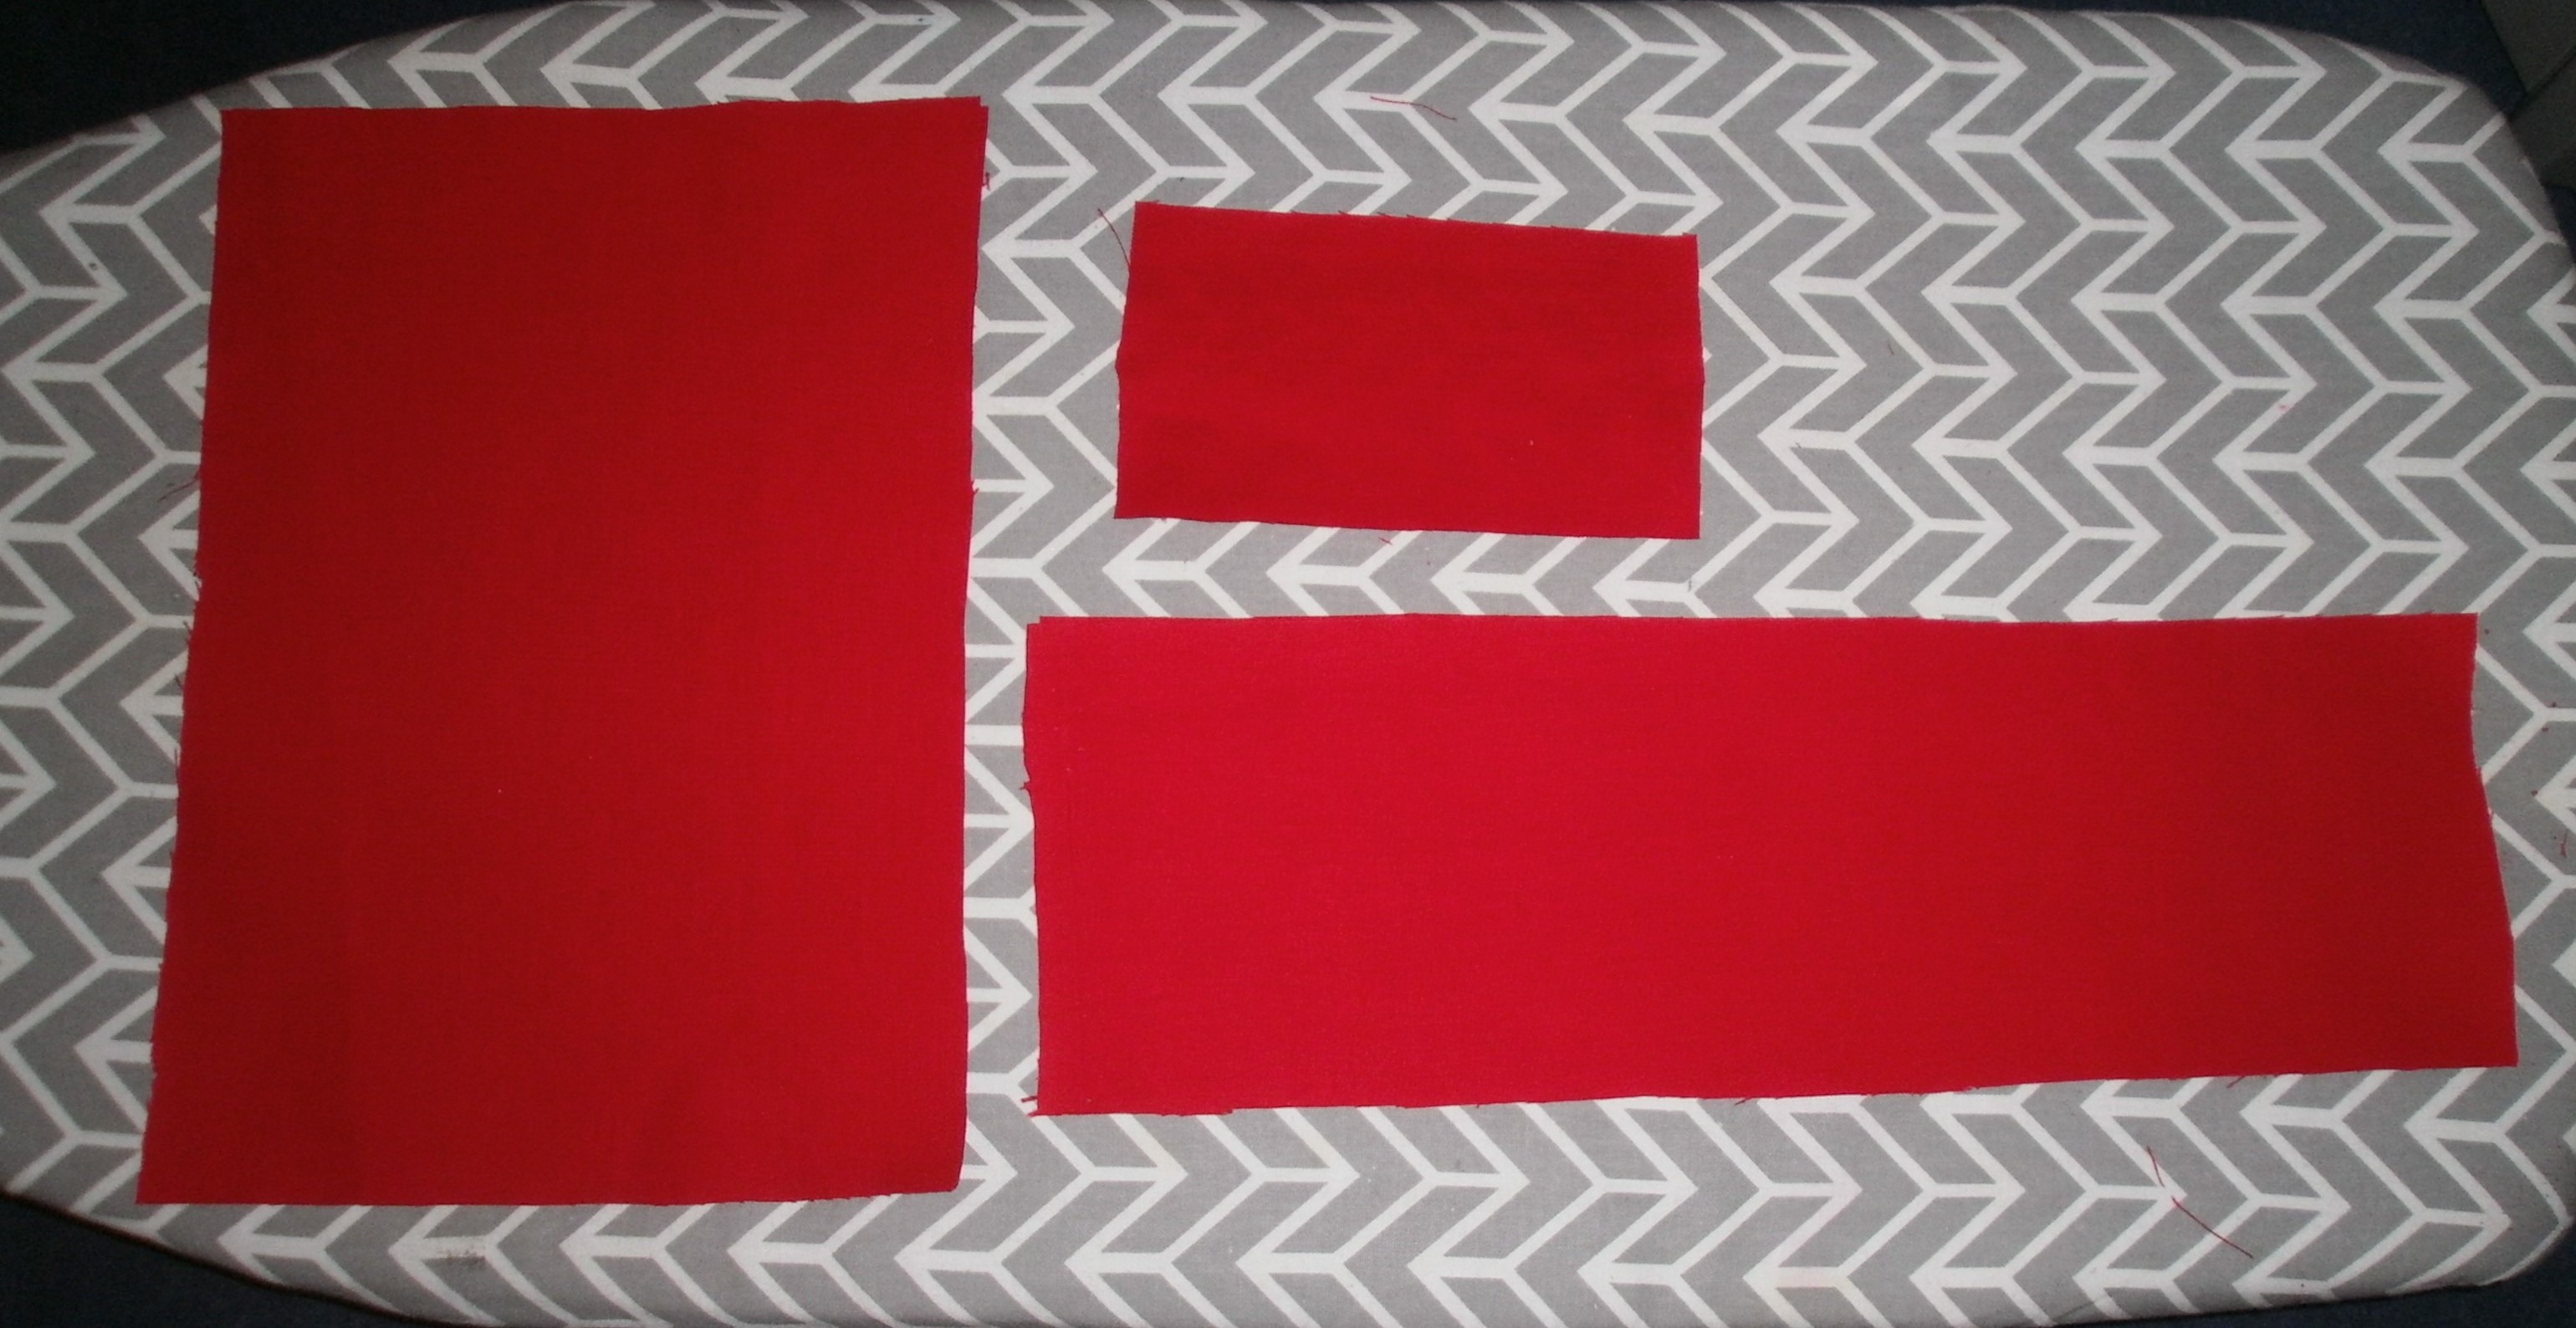 Cut rectangles from fabric of your choice. For a large front bow on Sailor Moon, cut to these measurements from red fabric:
10 inches X 7 inches(cut 2),
13 inches X 4 inches(cut 2),
2.5 inches X 4.5 inches(cut 1).
For a large Sailor Moon back bow, cut to these measurements:
14.75 inches X 9 inches(cut 2),
5 inches X 18 inches(cut 2),
3.5 inches X 6.5 inches(cut 1).
For the back bow, because it is so large and to help keep it’s shape, also cut 1 piece 14.75 inches X 9 inches from quilt batting. Layer this on top of the bow pieces the same size when sewing, everything else is done the same way as the front Sailor Moon bow shown in this tutorial.

For the 2 larger rectangles, sew the 2 layers together leaving an opening in the center bottom for turning right side out.
Fold the smallest rectangle in half and sew along one edge.
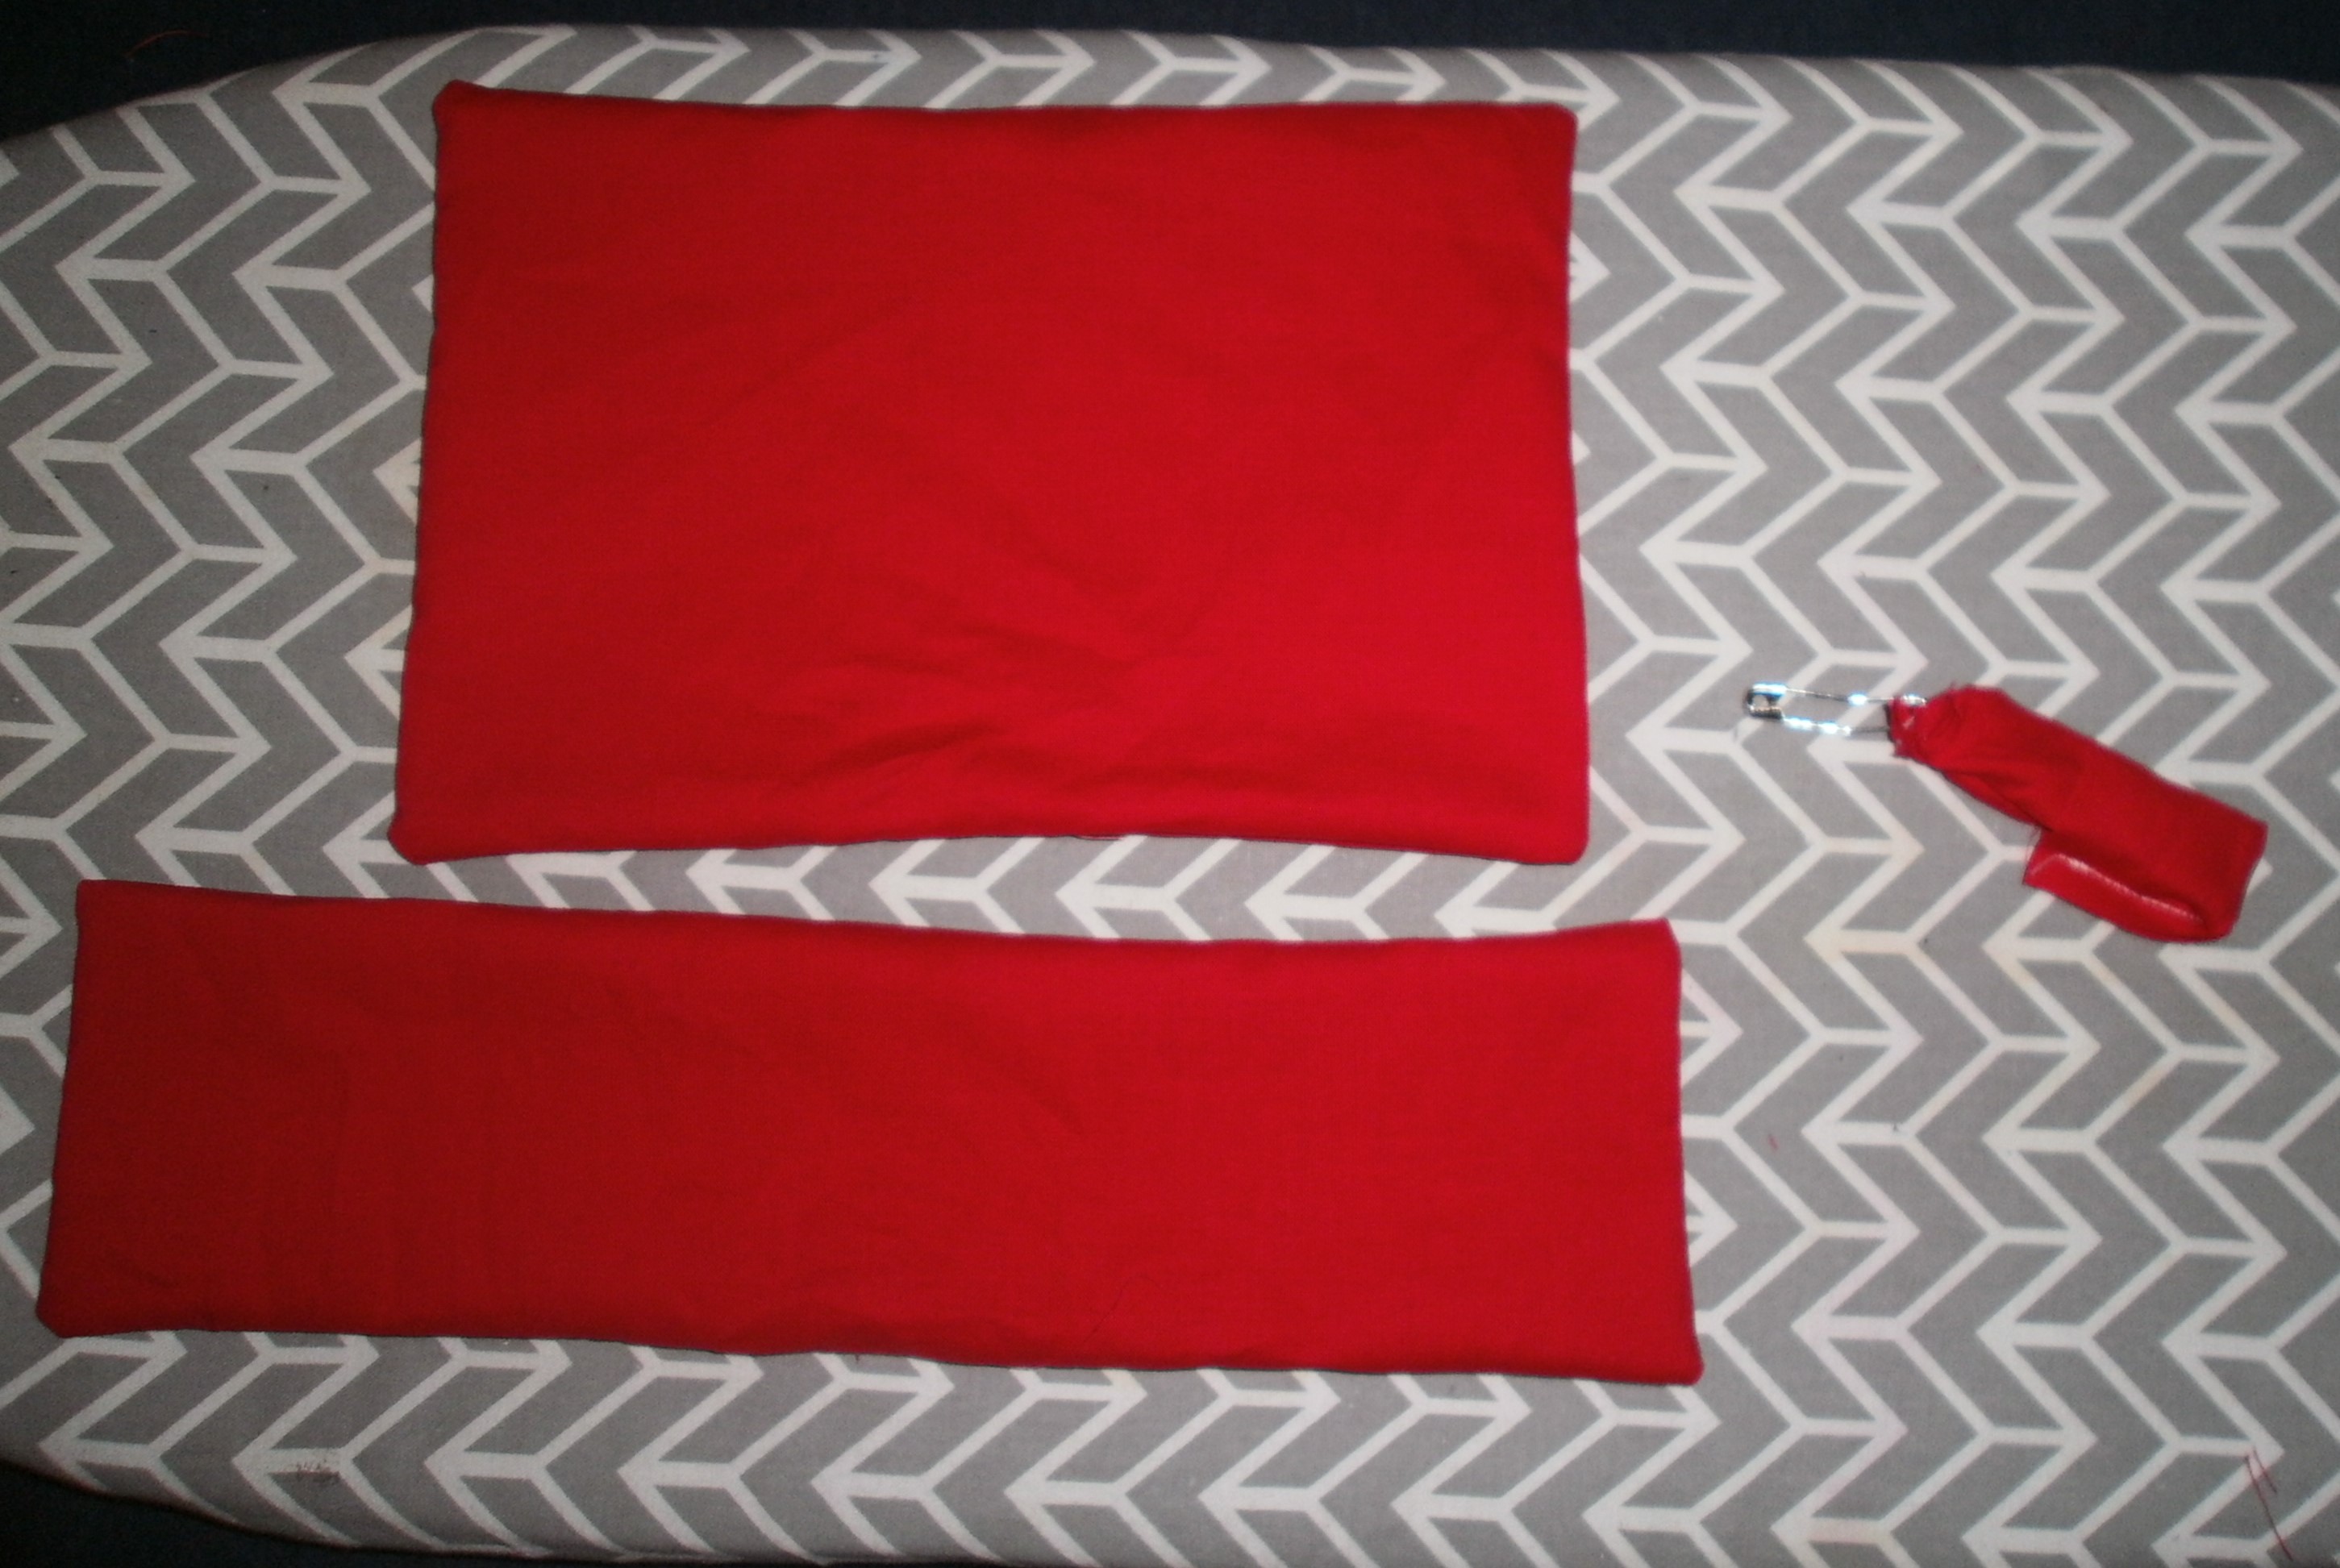
Turn everything right side out.
Use a safety pin to help turn the small piece right side out.
On the 2 larger pieces, top stitch with red or matching thread to sew the little openings closed.

Stack the 3 pieces as shown, with the longest piece on the bottom, smallest piece on top.
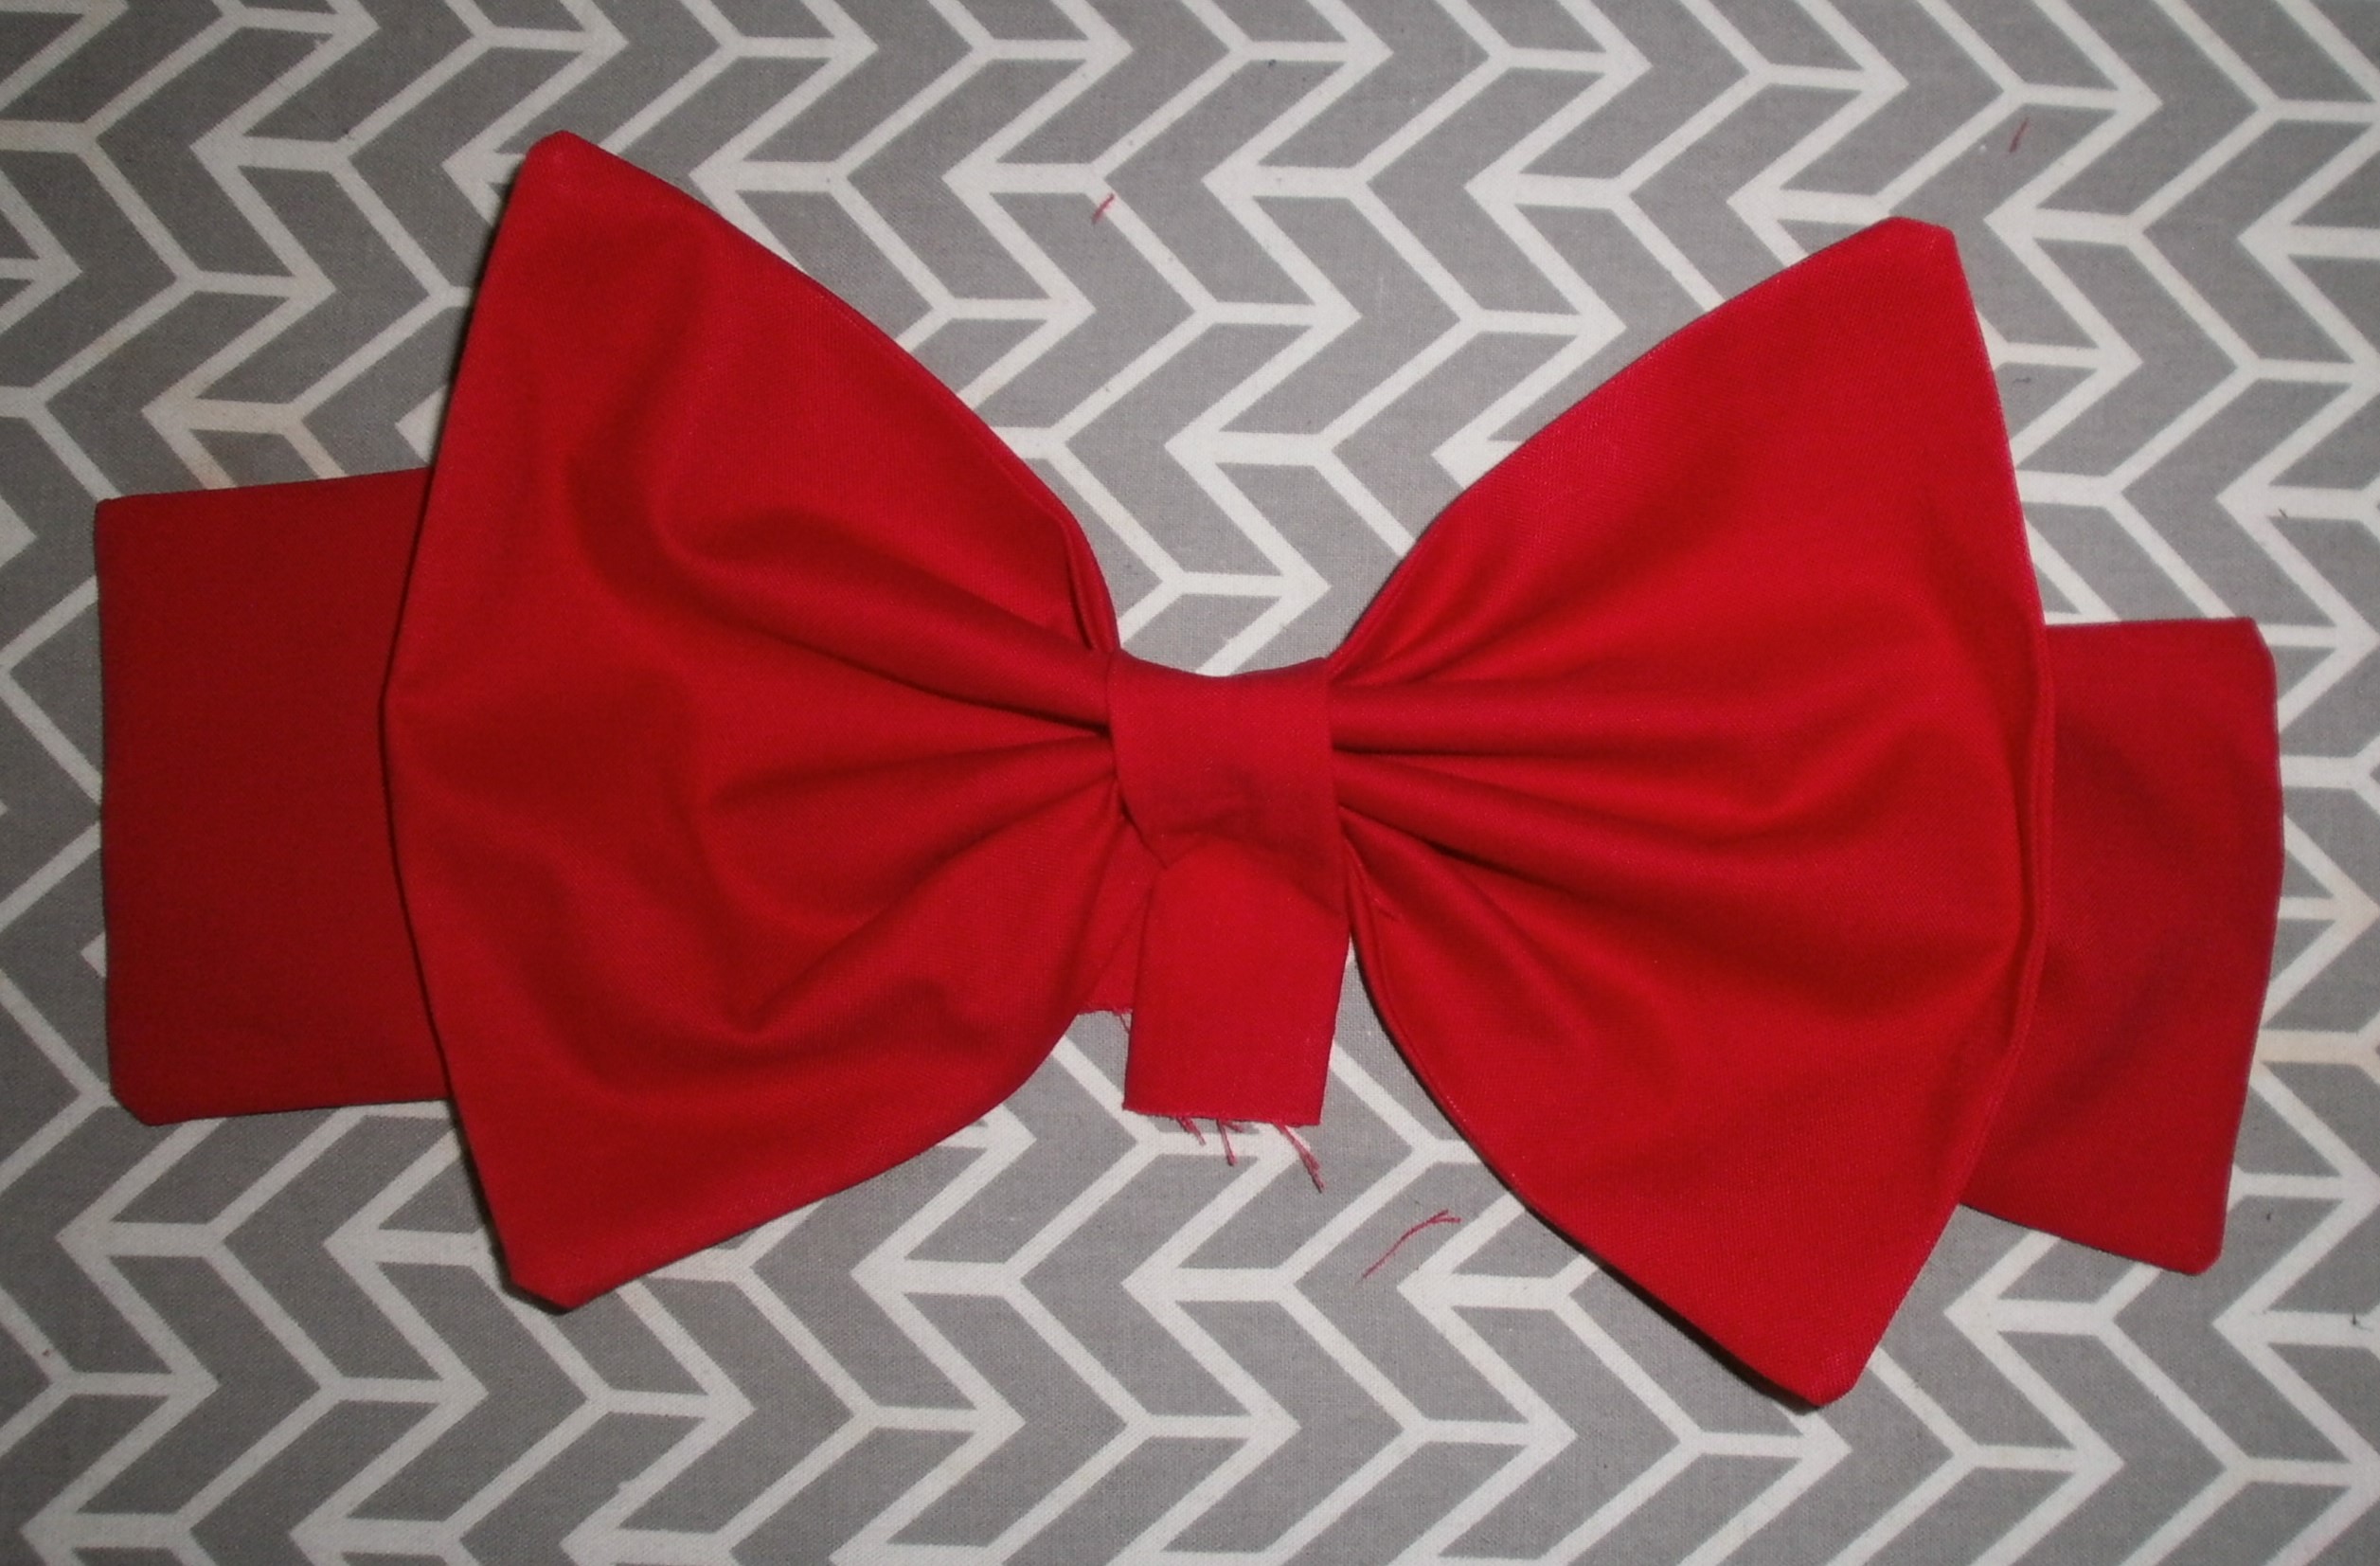
Wrap the smallest piece around the other 2 pieces and mark the length you need to go around.
Take just the little piece to your sewing machine and sew where you marked, you should then have a little loop.
Trim the excess fabric and turn the little loop so your sew line goes to the inside.
Push each of the larger rectangles into the little loop starting with the 10 X 7 piece.
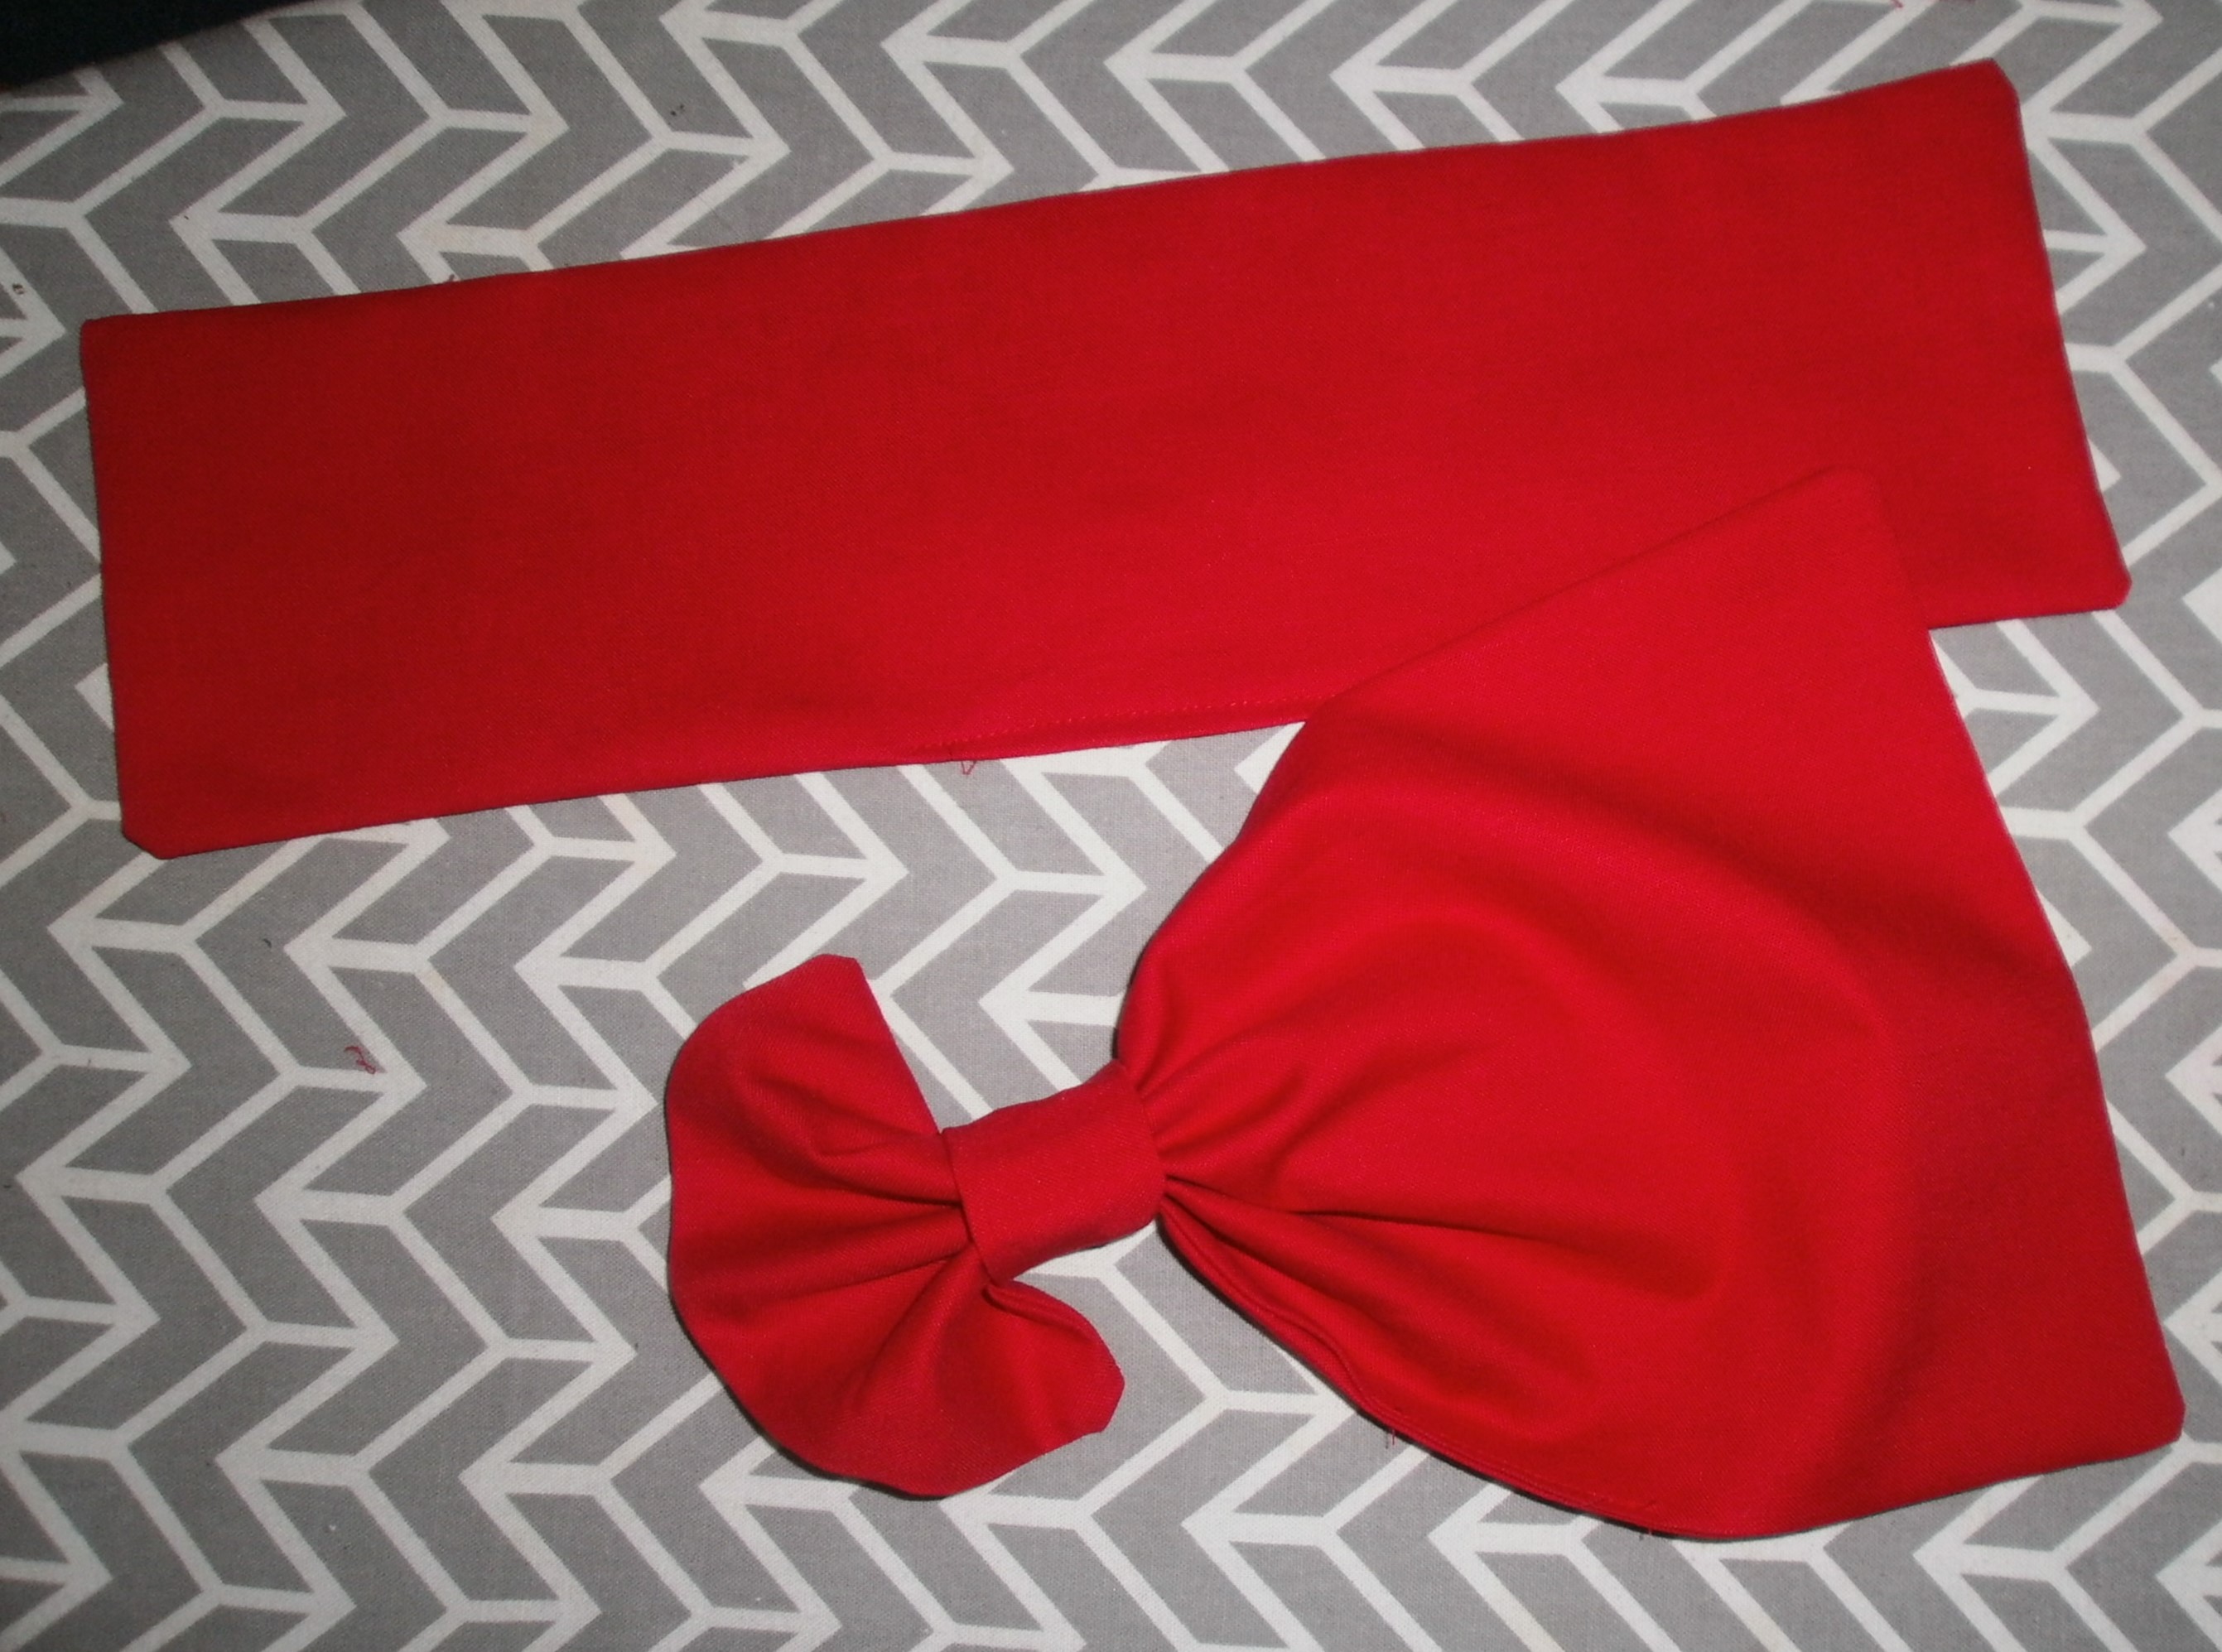
Step 8
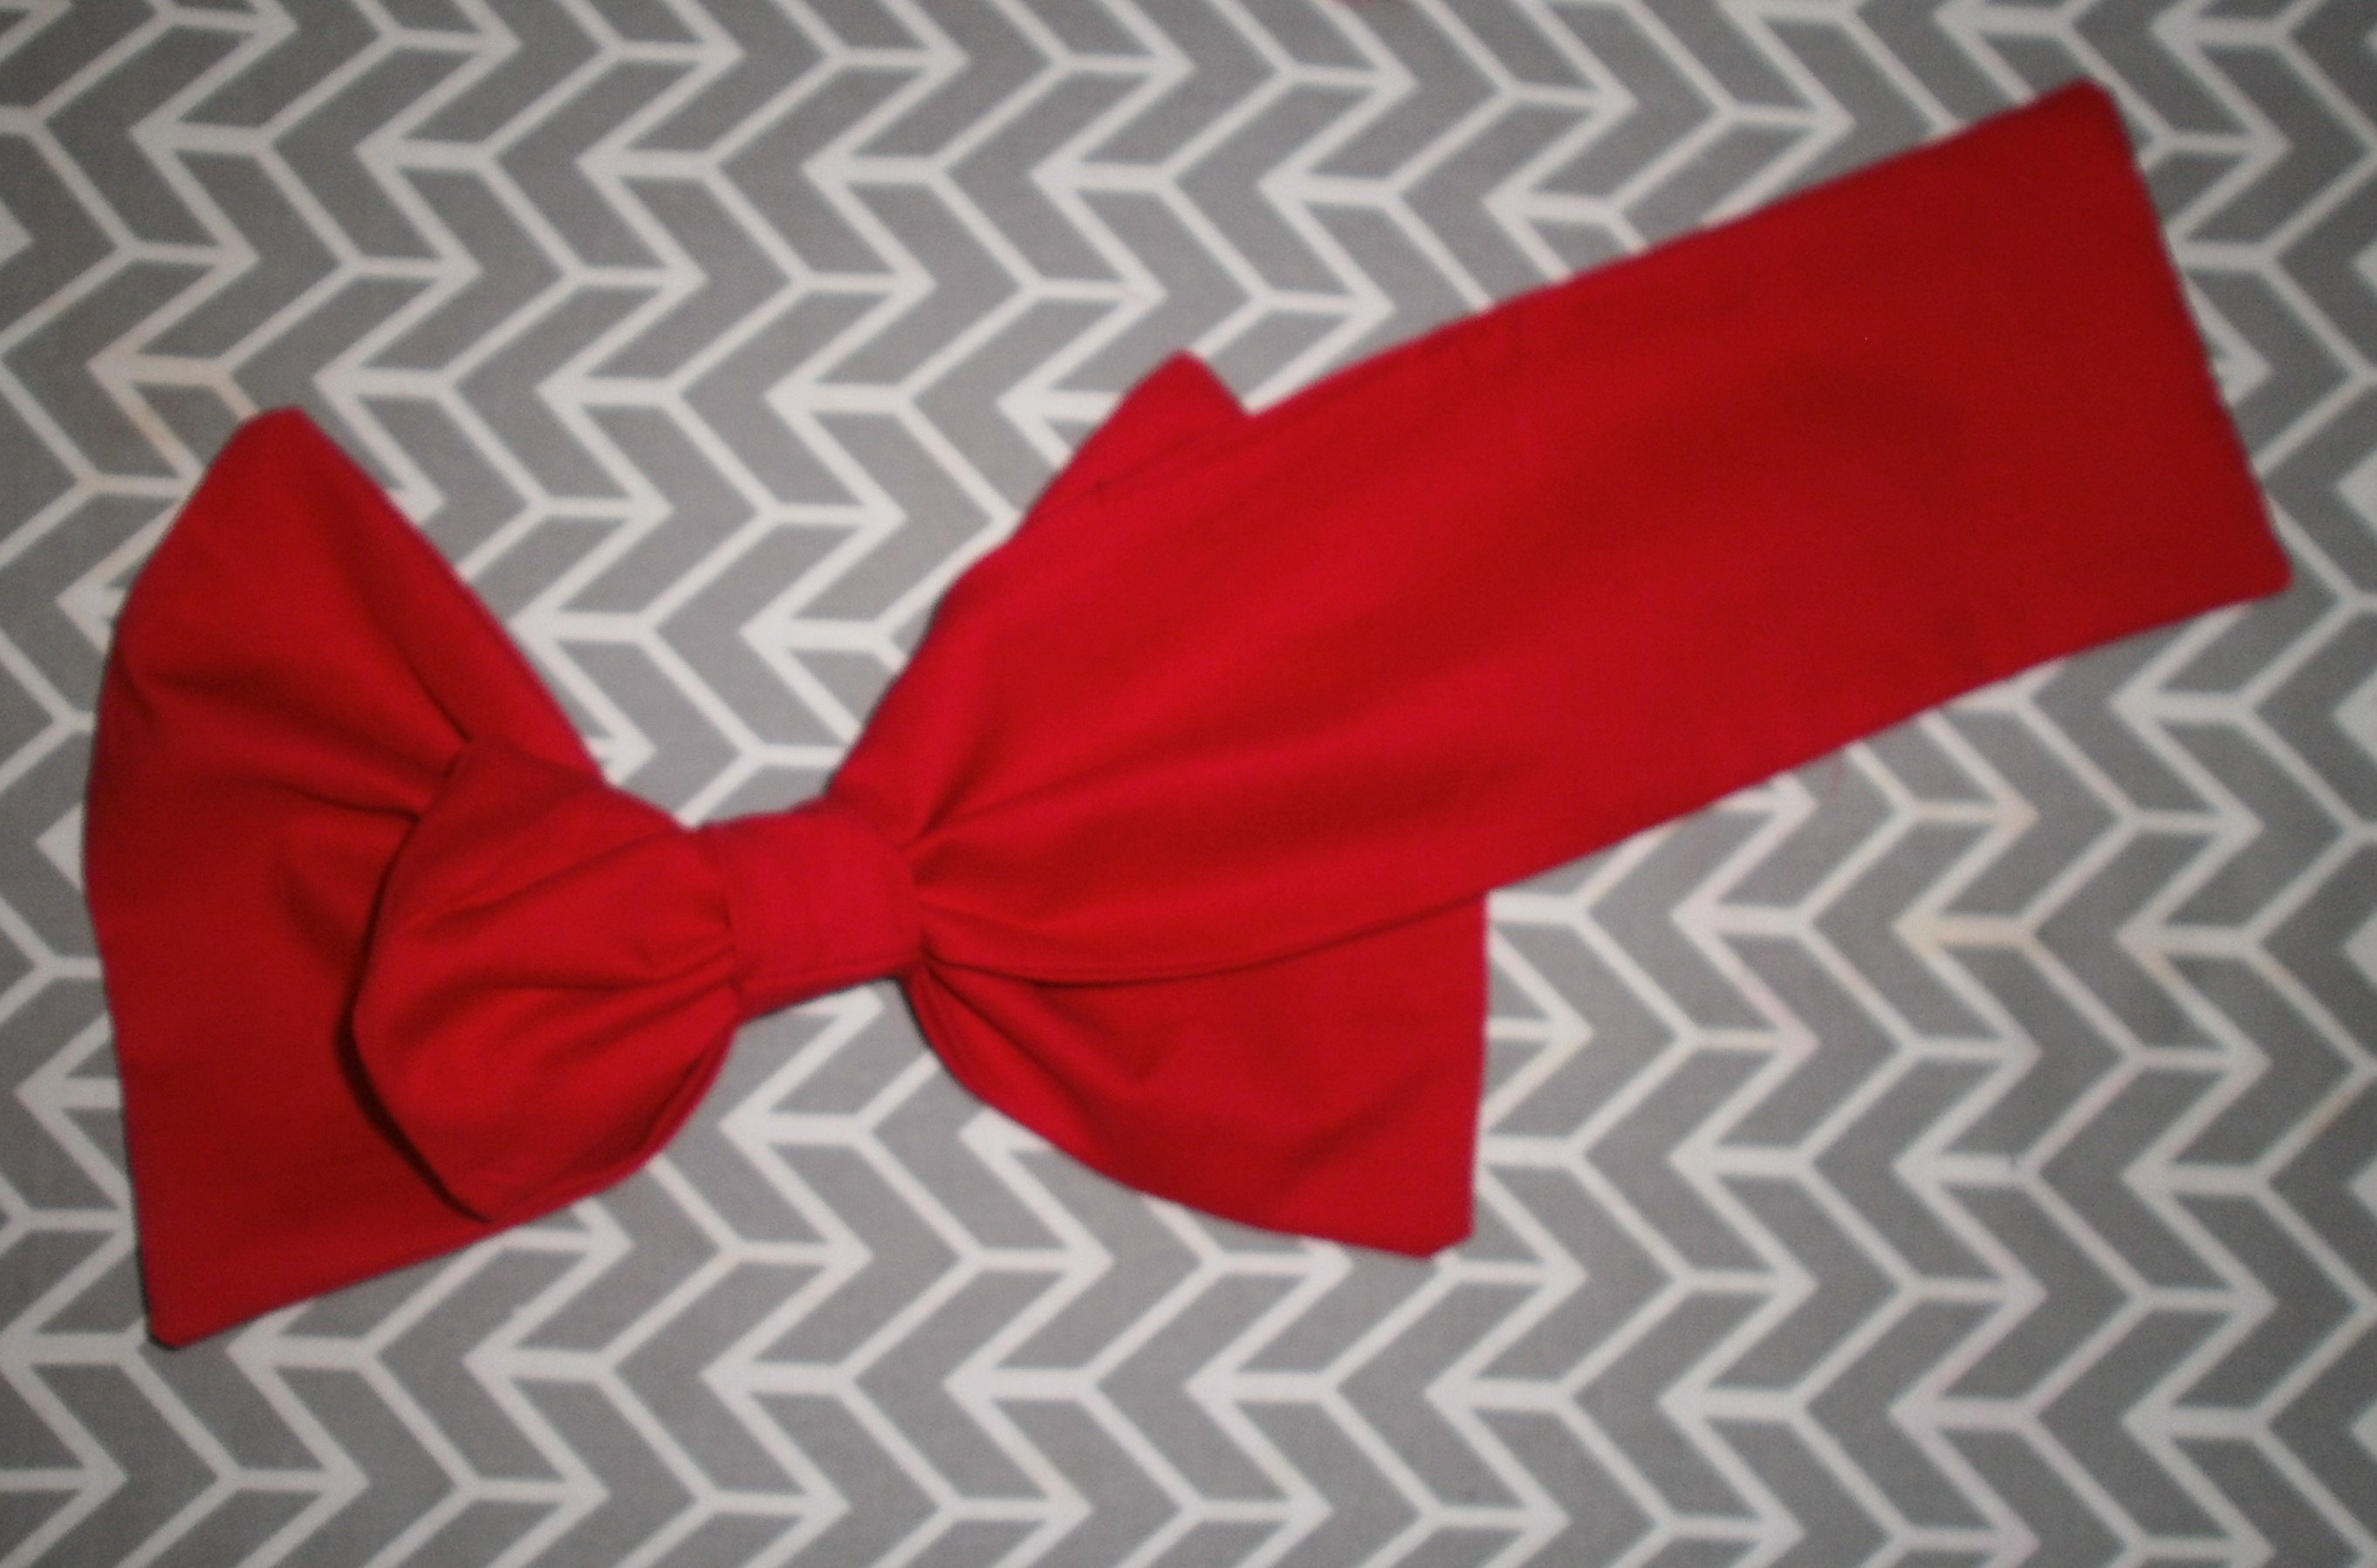
Turn it over and push the longer rectangle also through the little loop.
Step 9
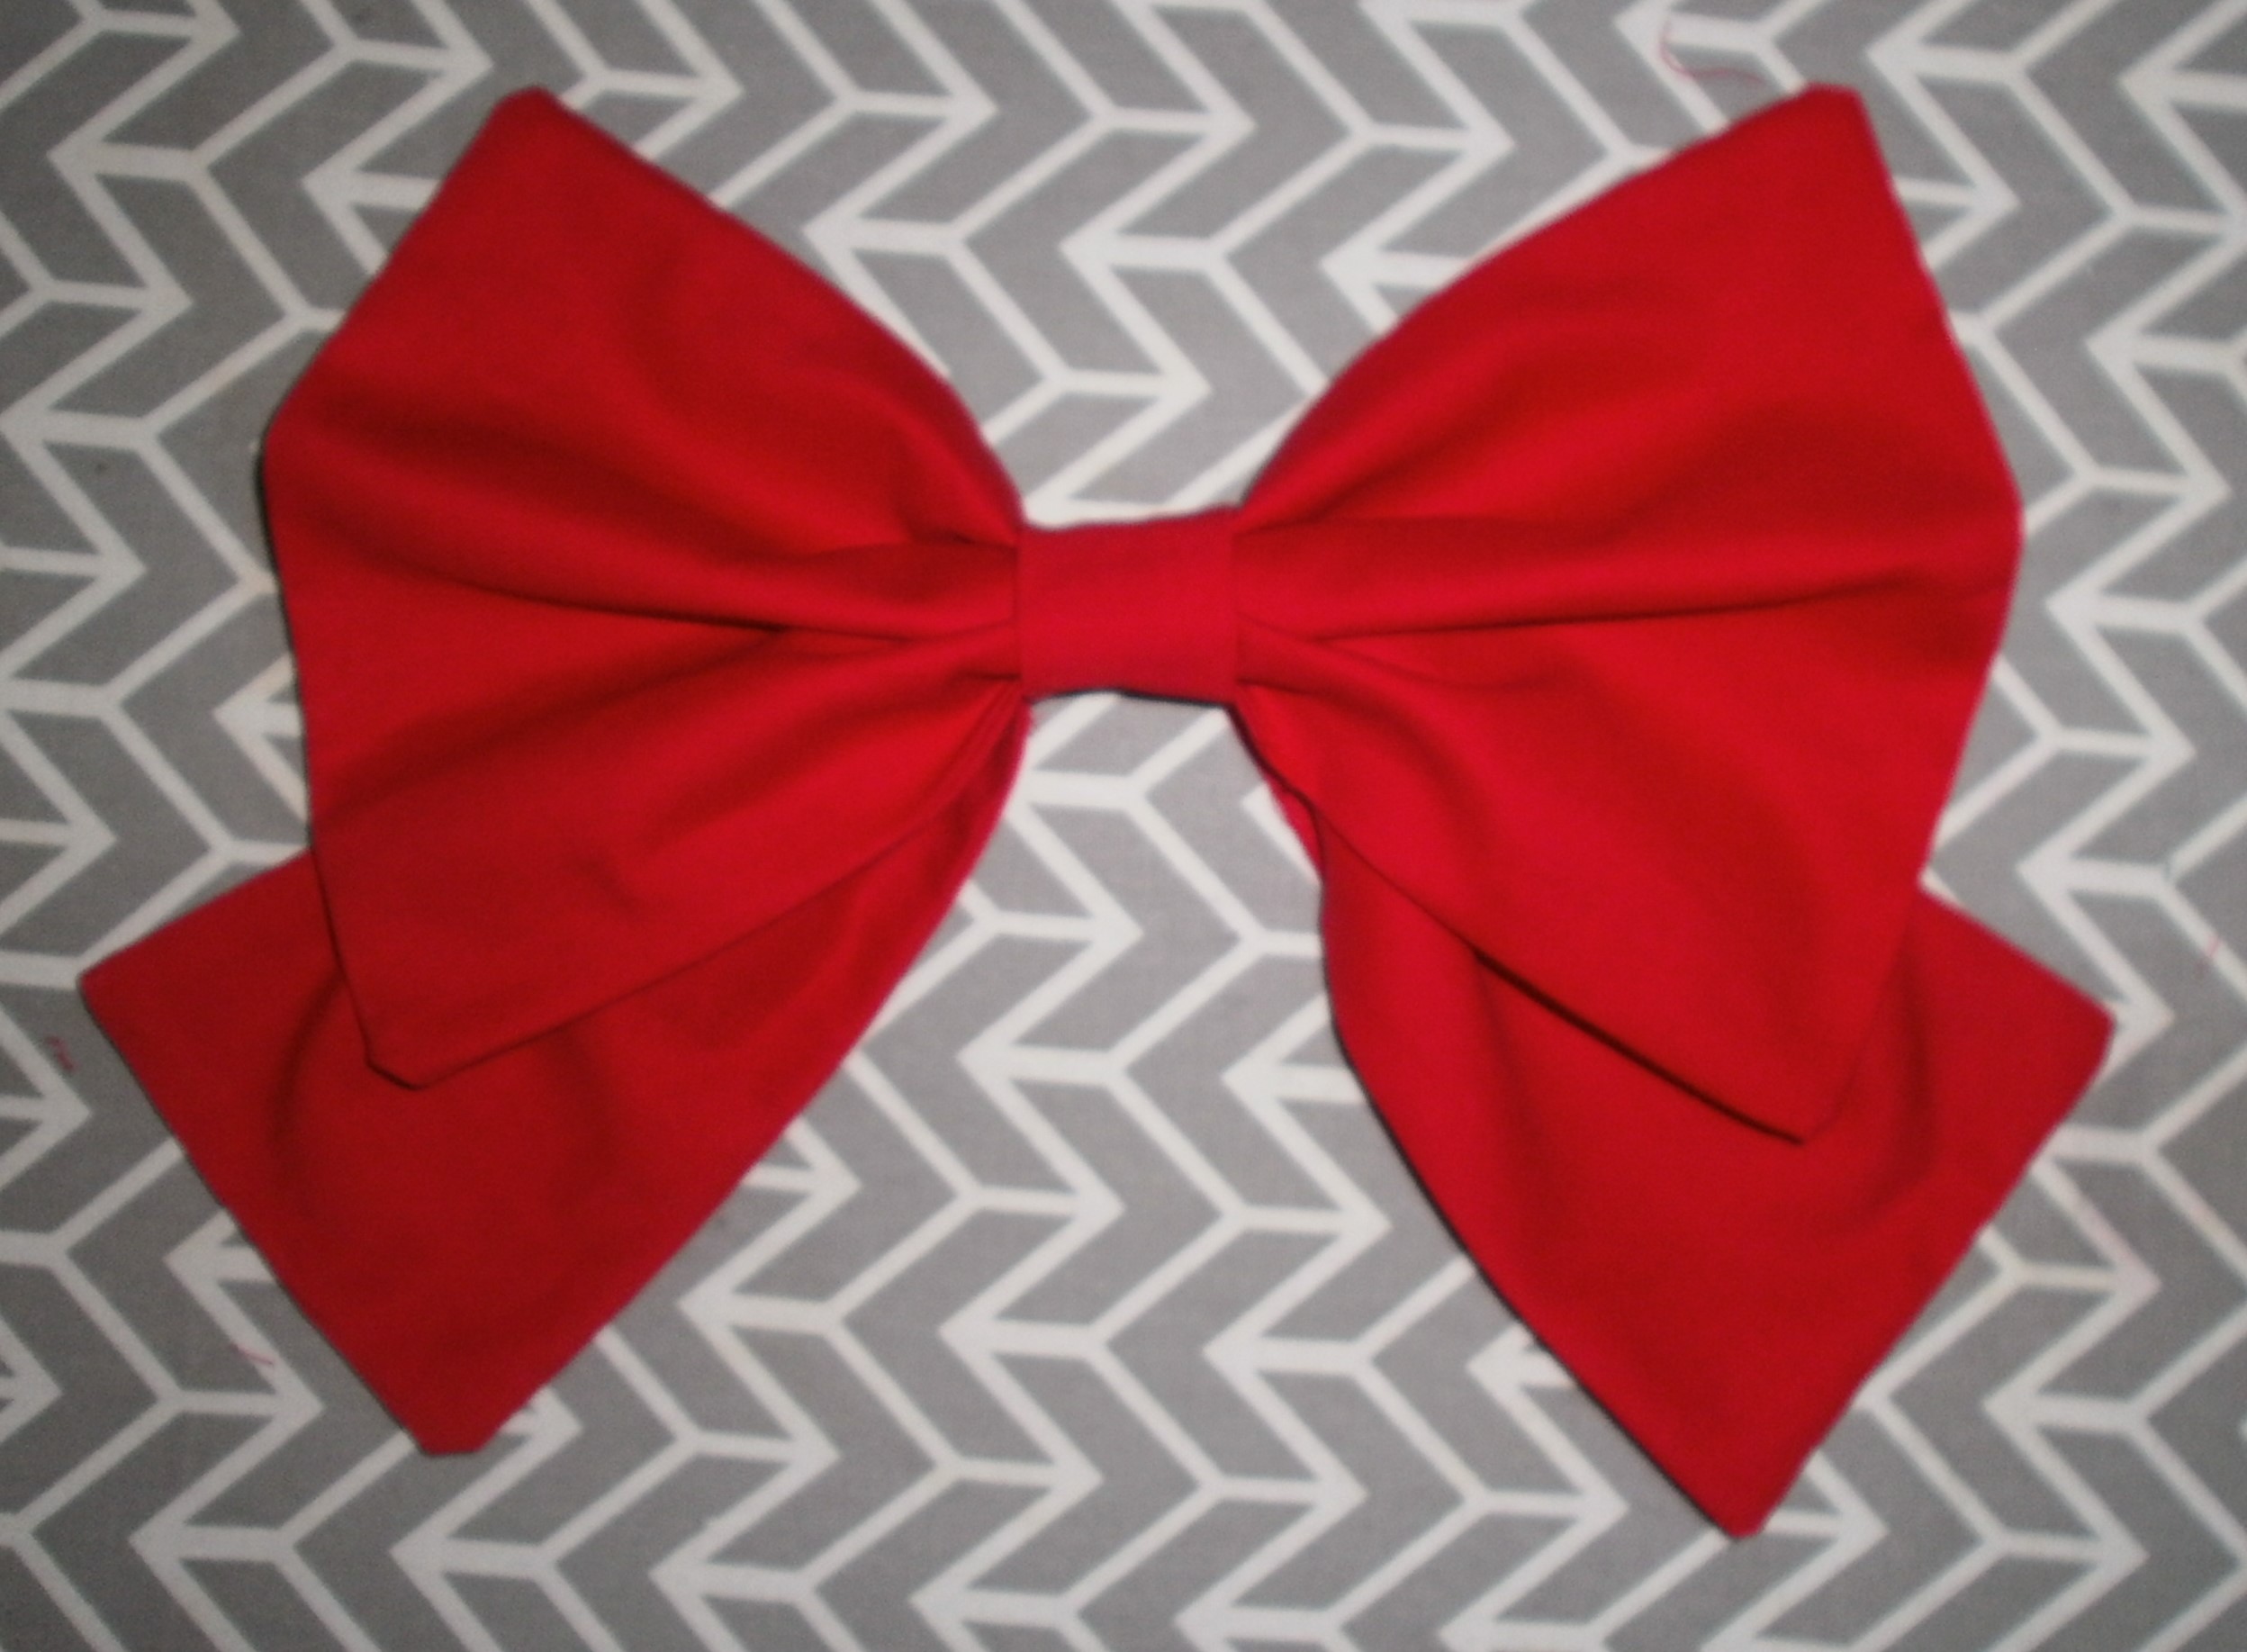
Turn it back over to the front and pull on each side to straighten it out. Pull the longer pieces downward to shape the lower portion of the bow. You are done!
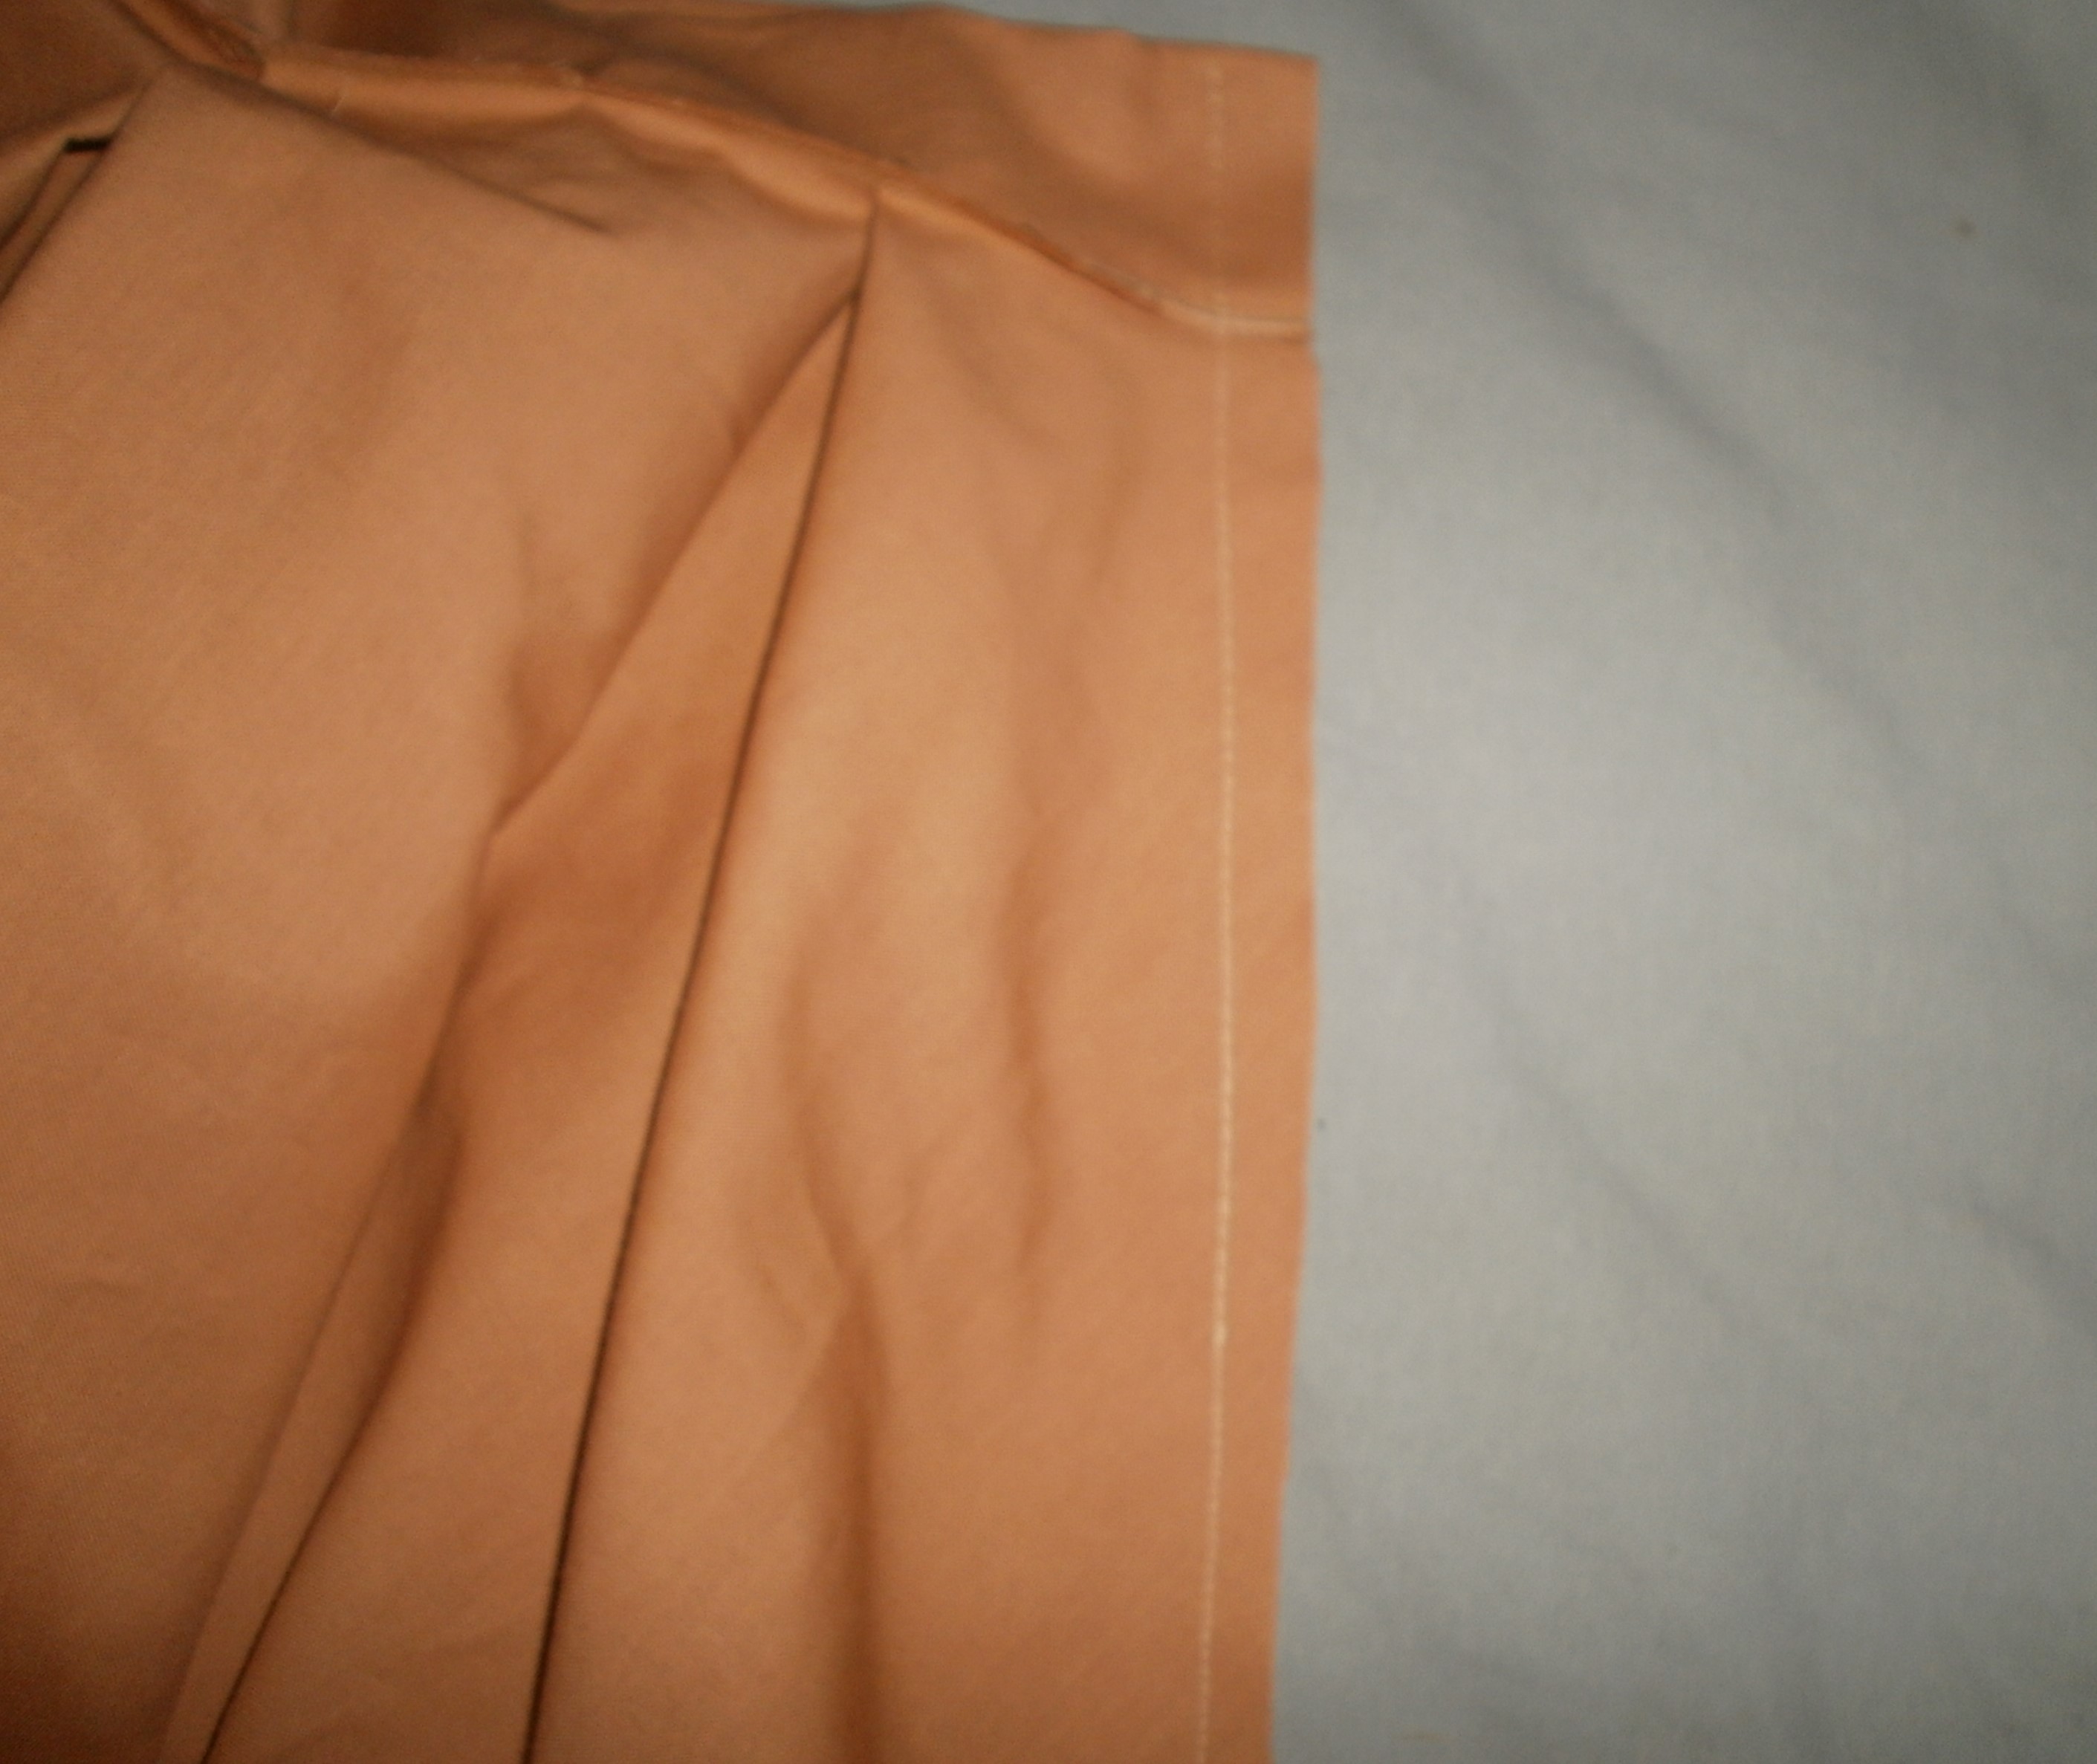
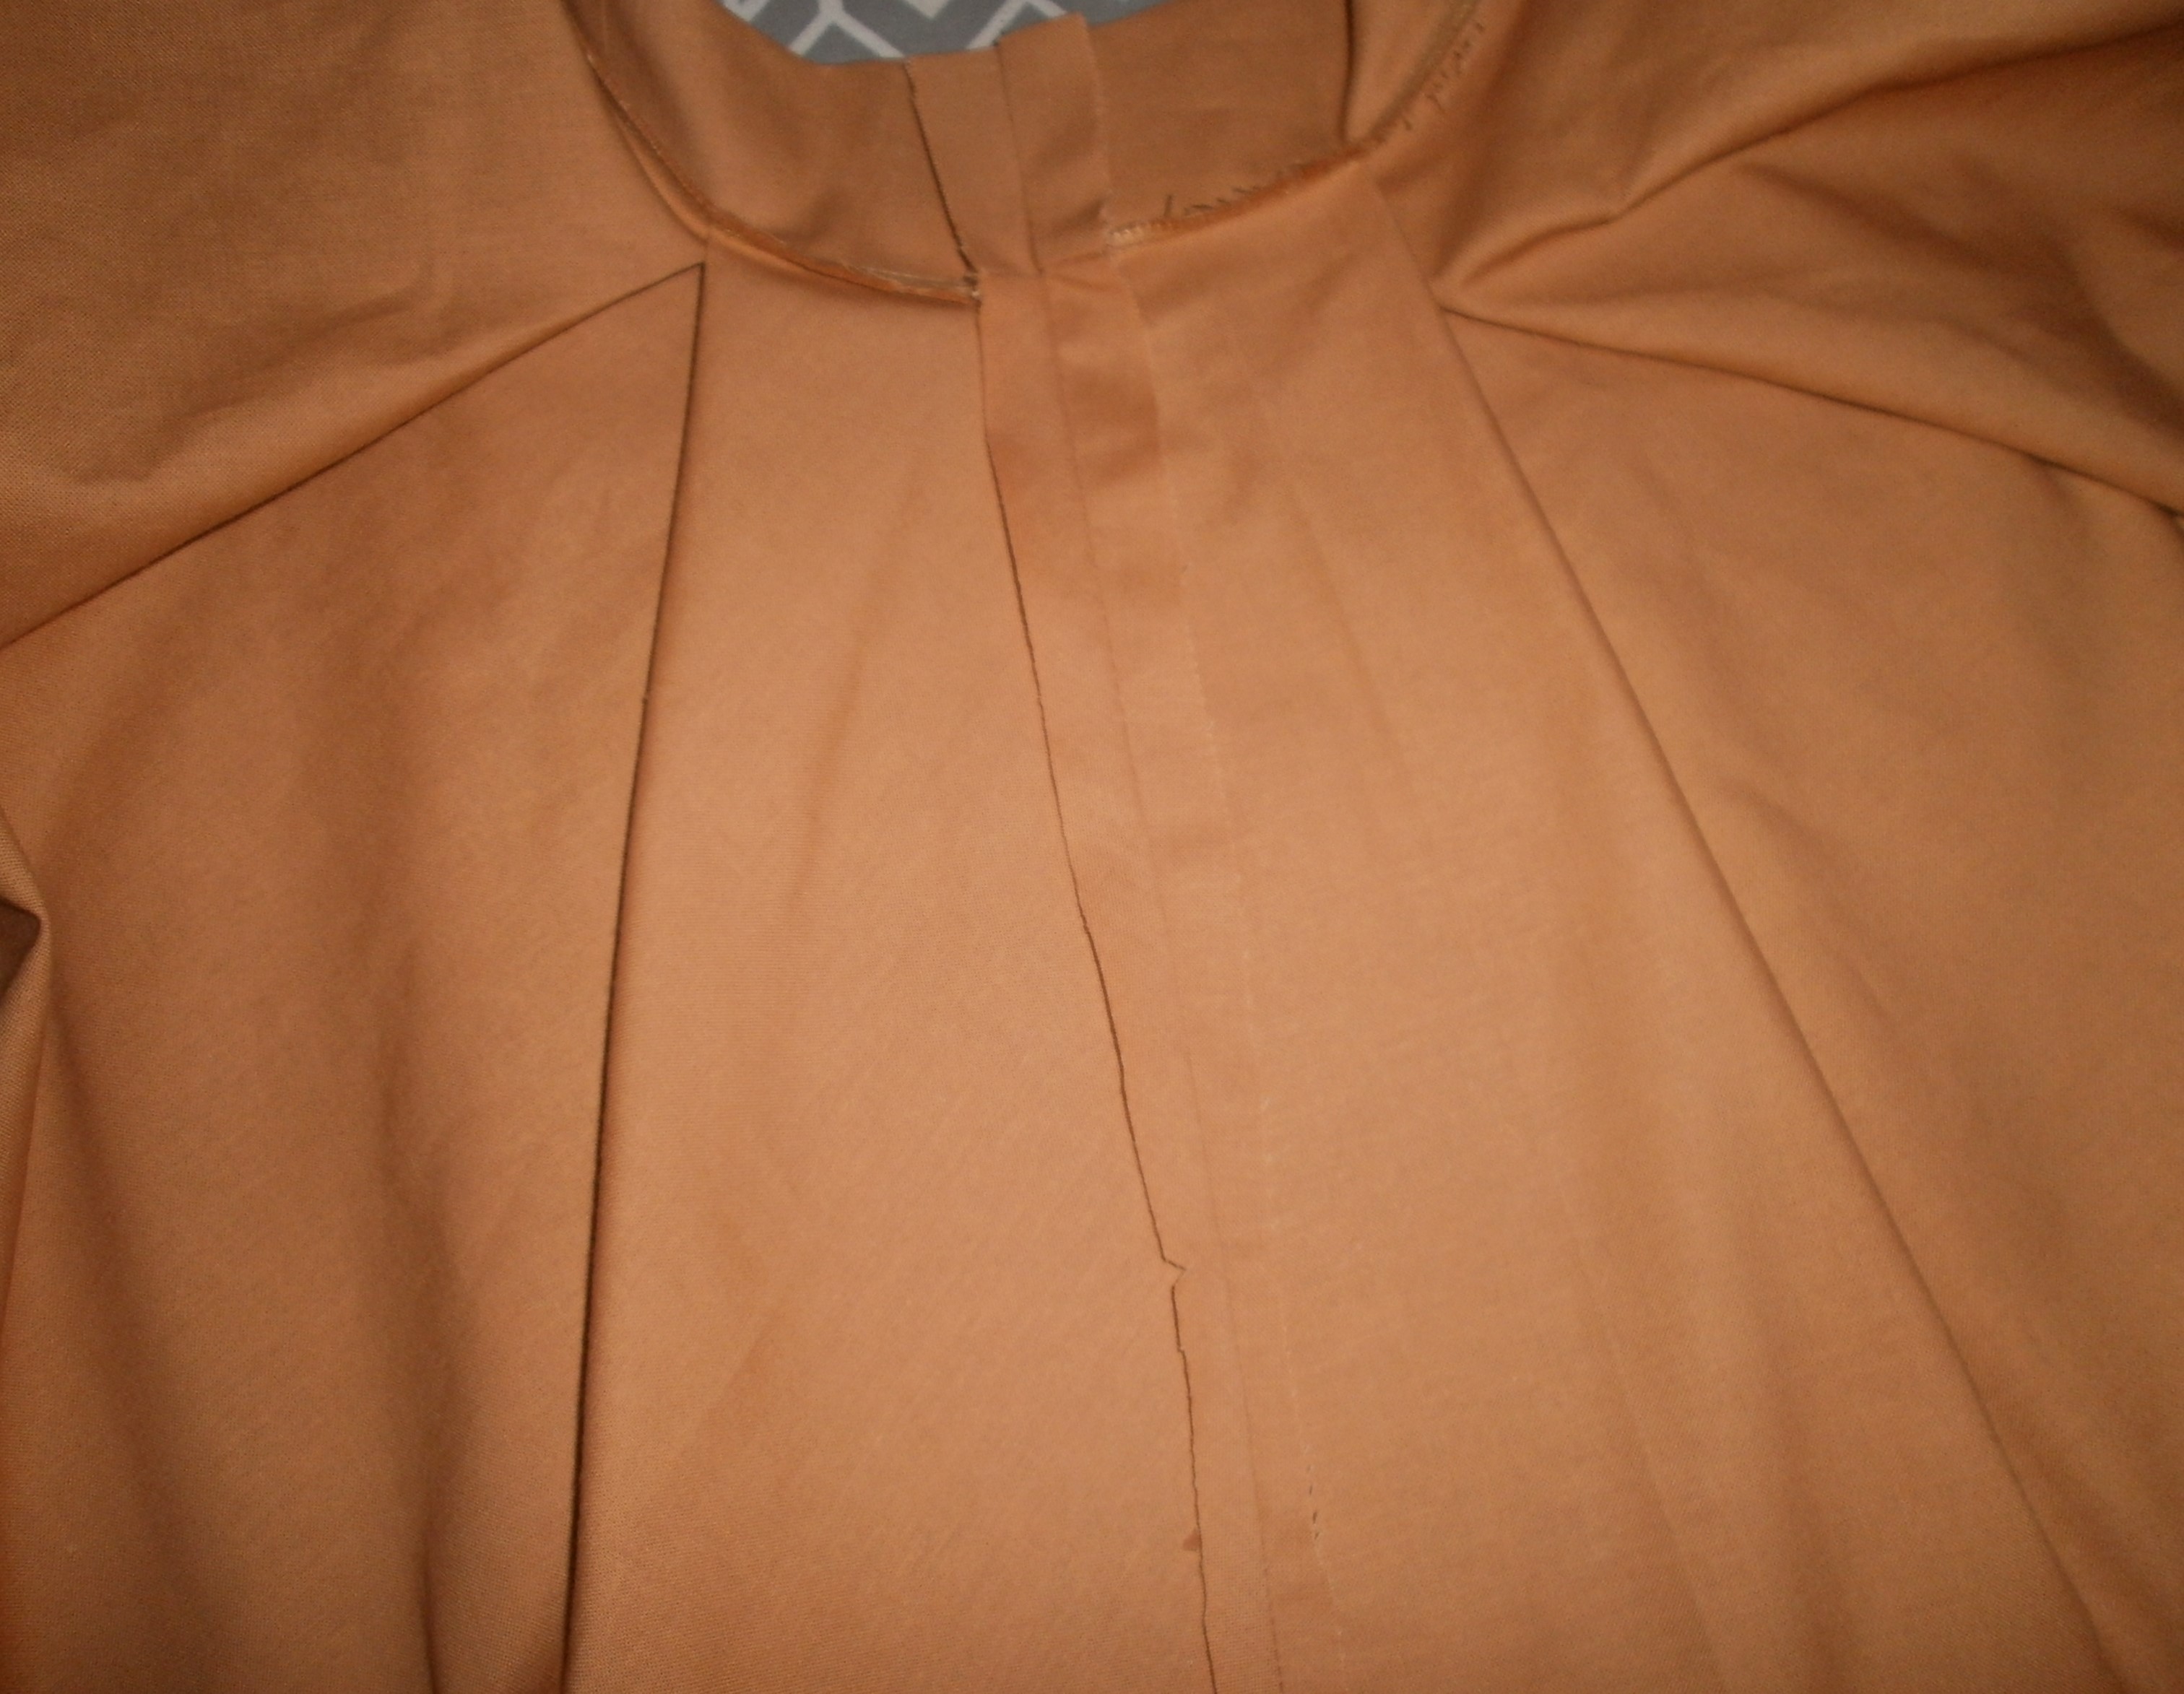
July 2017: Putting in an Invisible Zipper
Along the seam where you will be adding the zipper, baste the seam closed with large stitches that you will remove later.
Once you get down to where the zipper will end, and the seam will be permanent, switch from basting stitches to regular stitches.
The area where the zipper will go is basted. The rest of the seam is sewn normally.
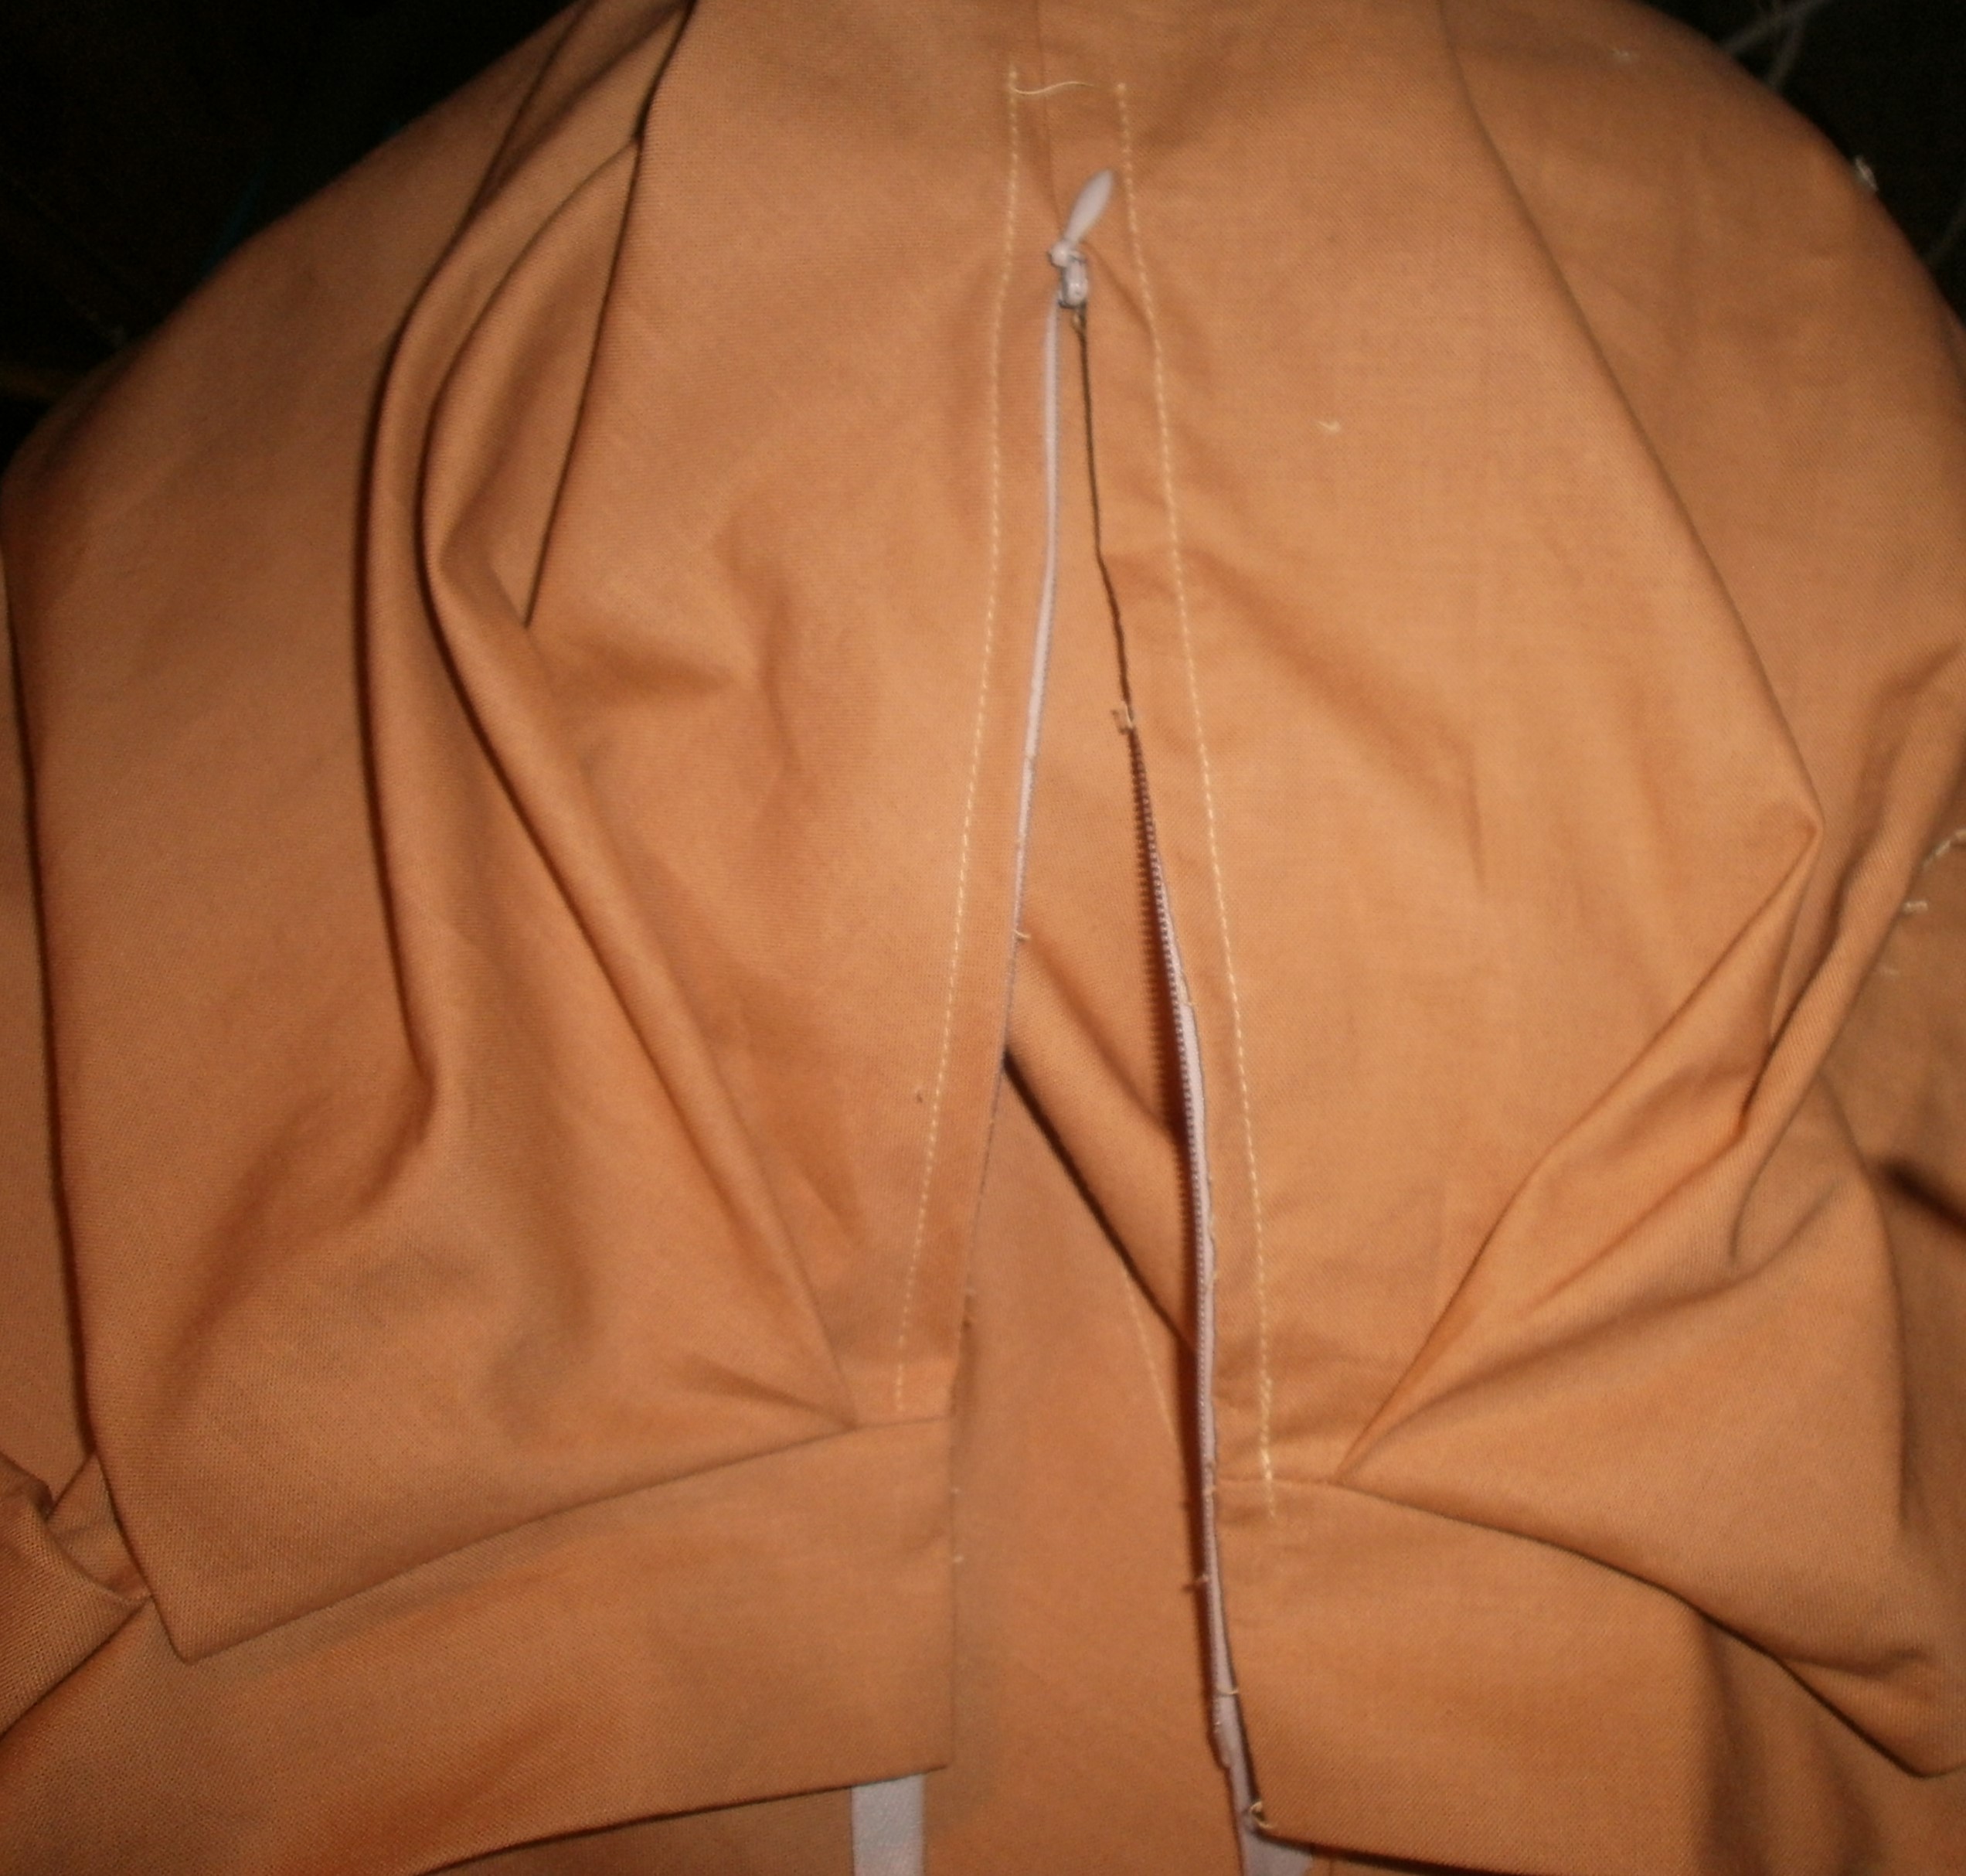
On our skirt the zipper will be added to the top center back.
So, the top portion is basted and lower portion of the seam is sewn normally. Make a little notch in the fabric where the basting stops and the regular stitching starts.
Iron the seam open.
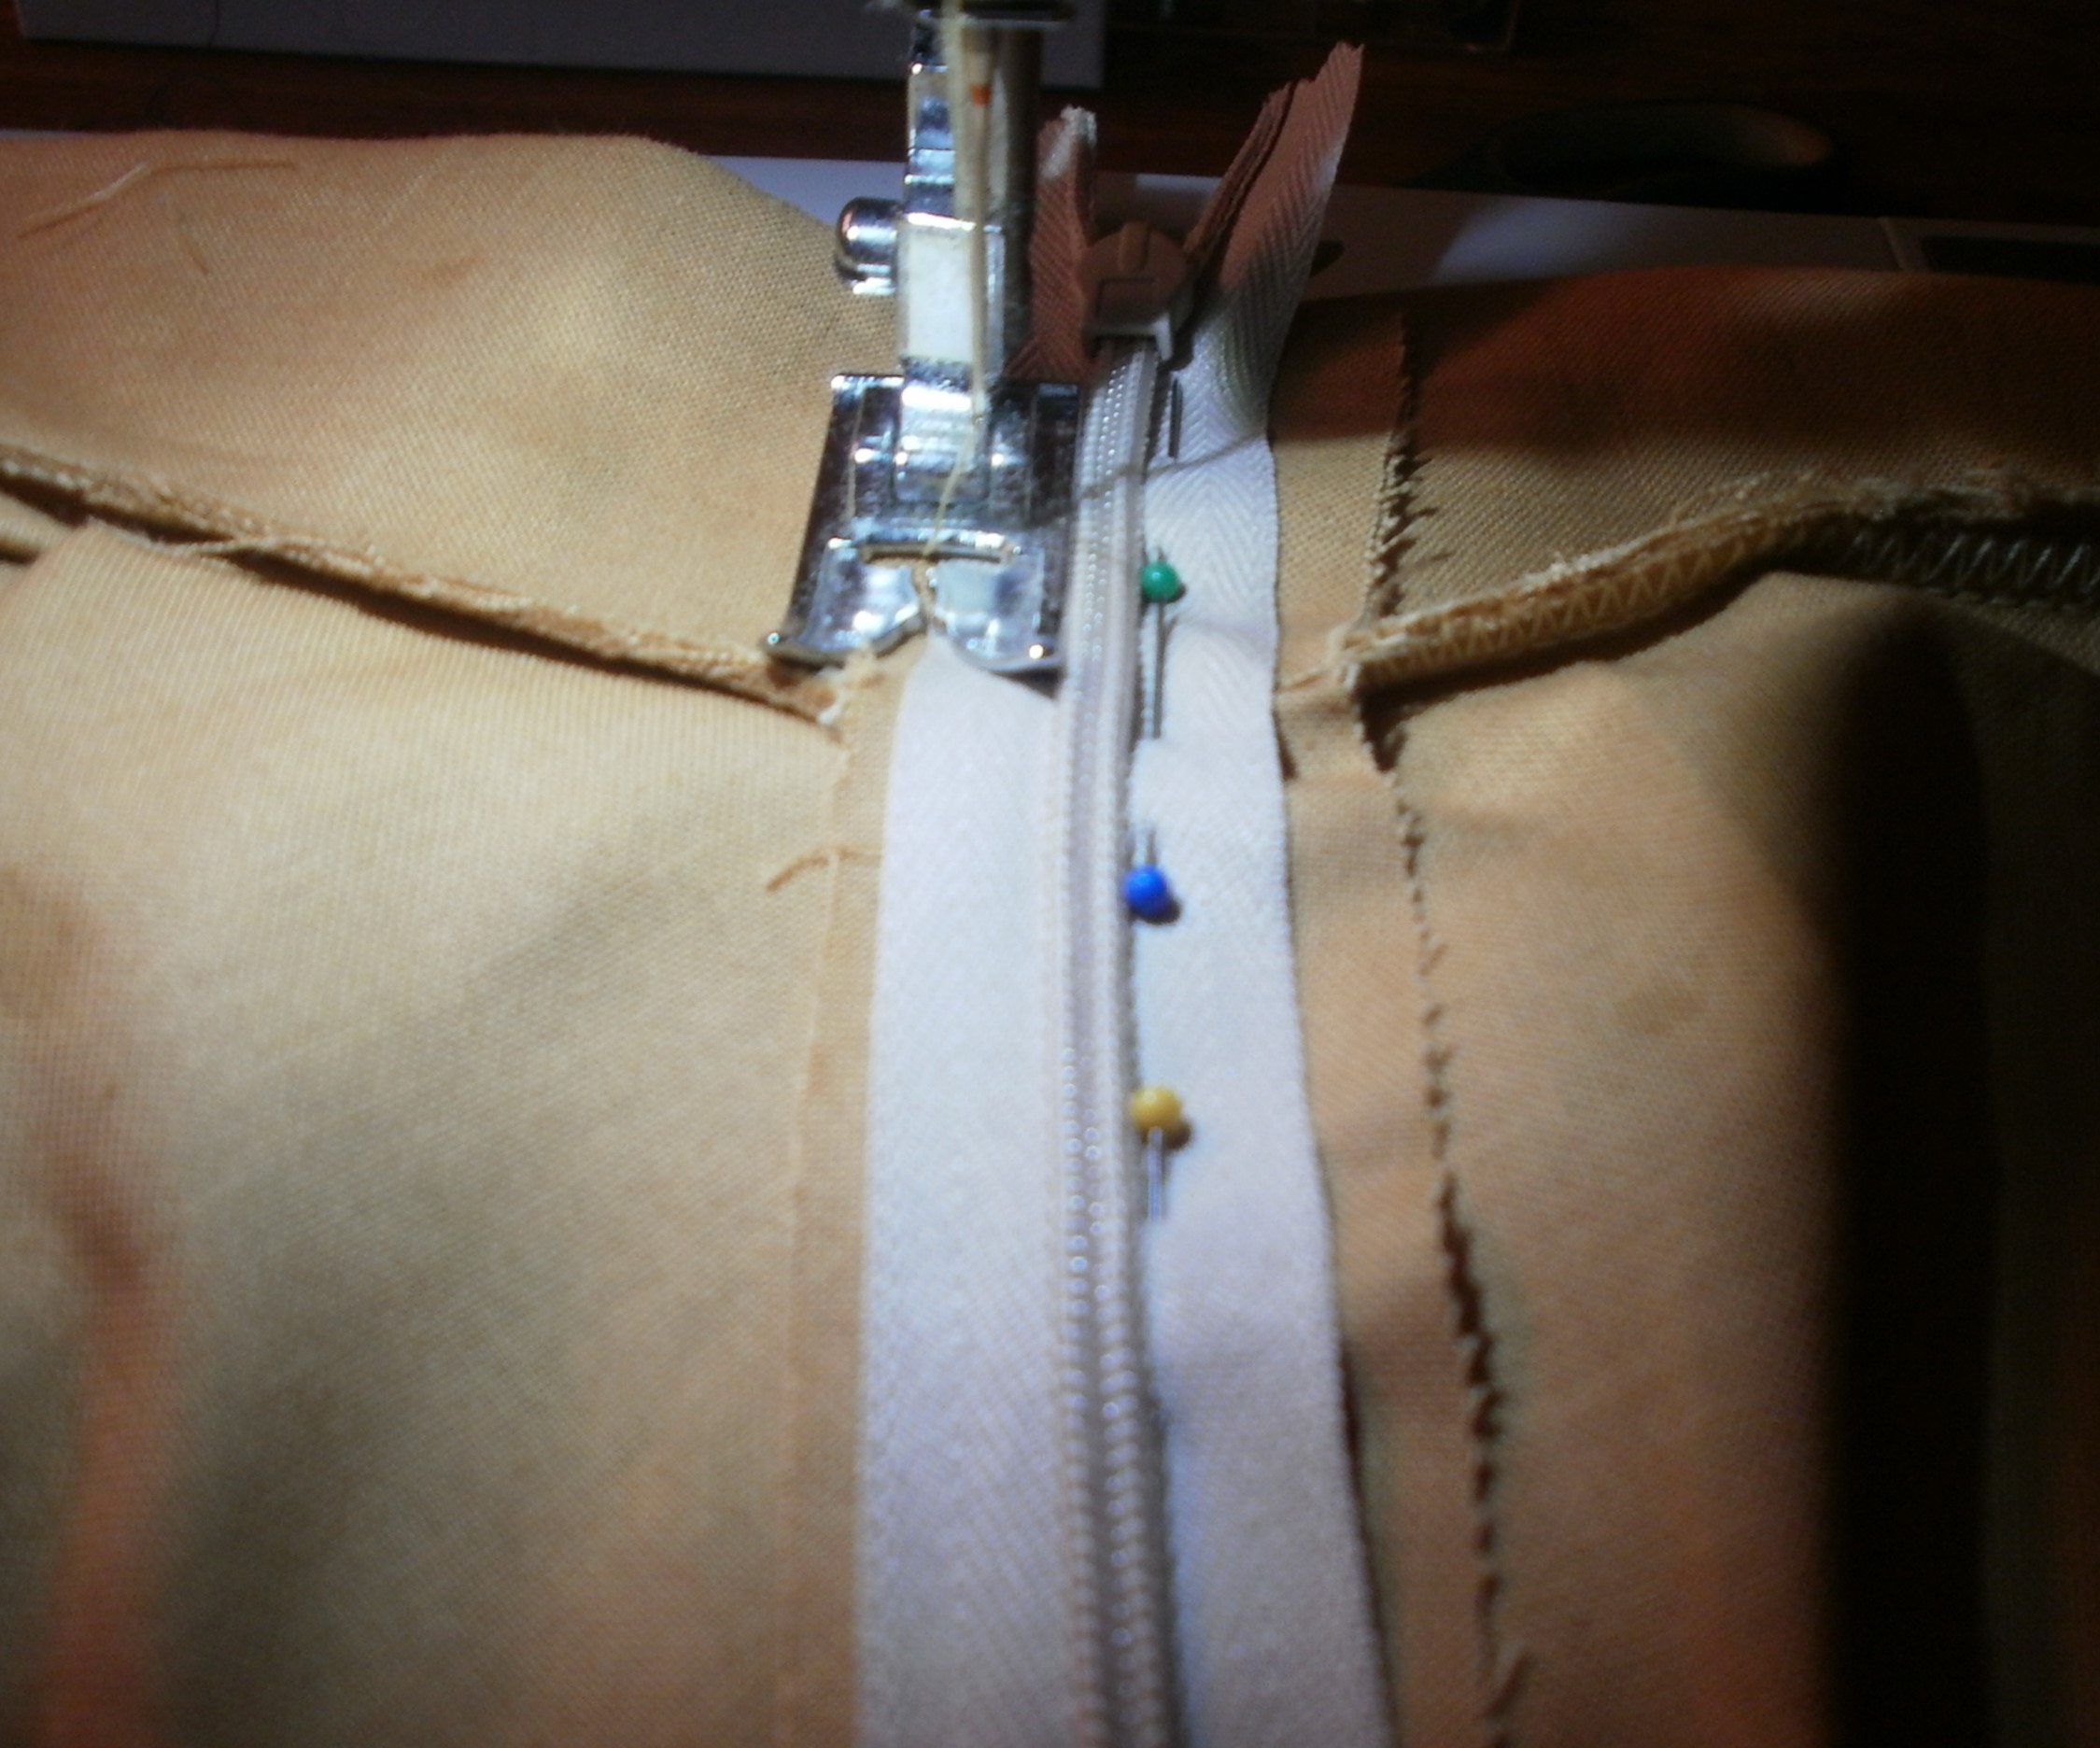
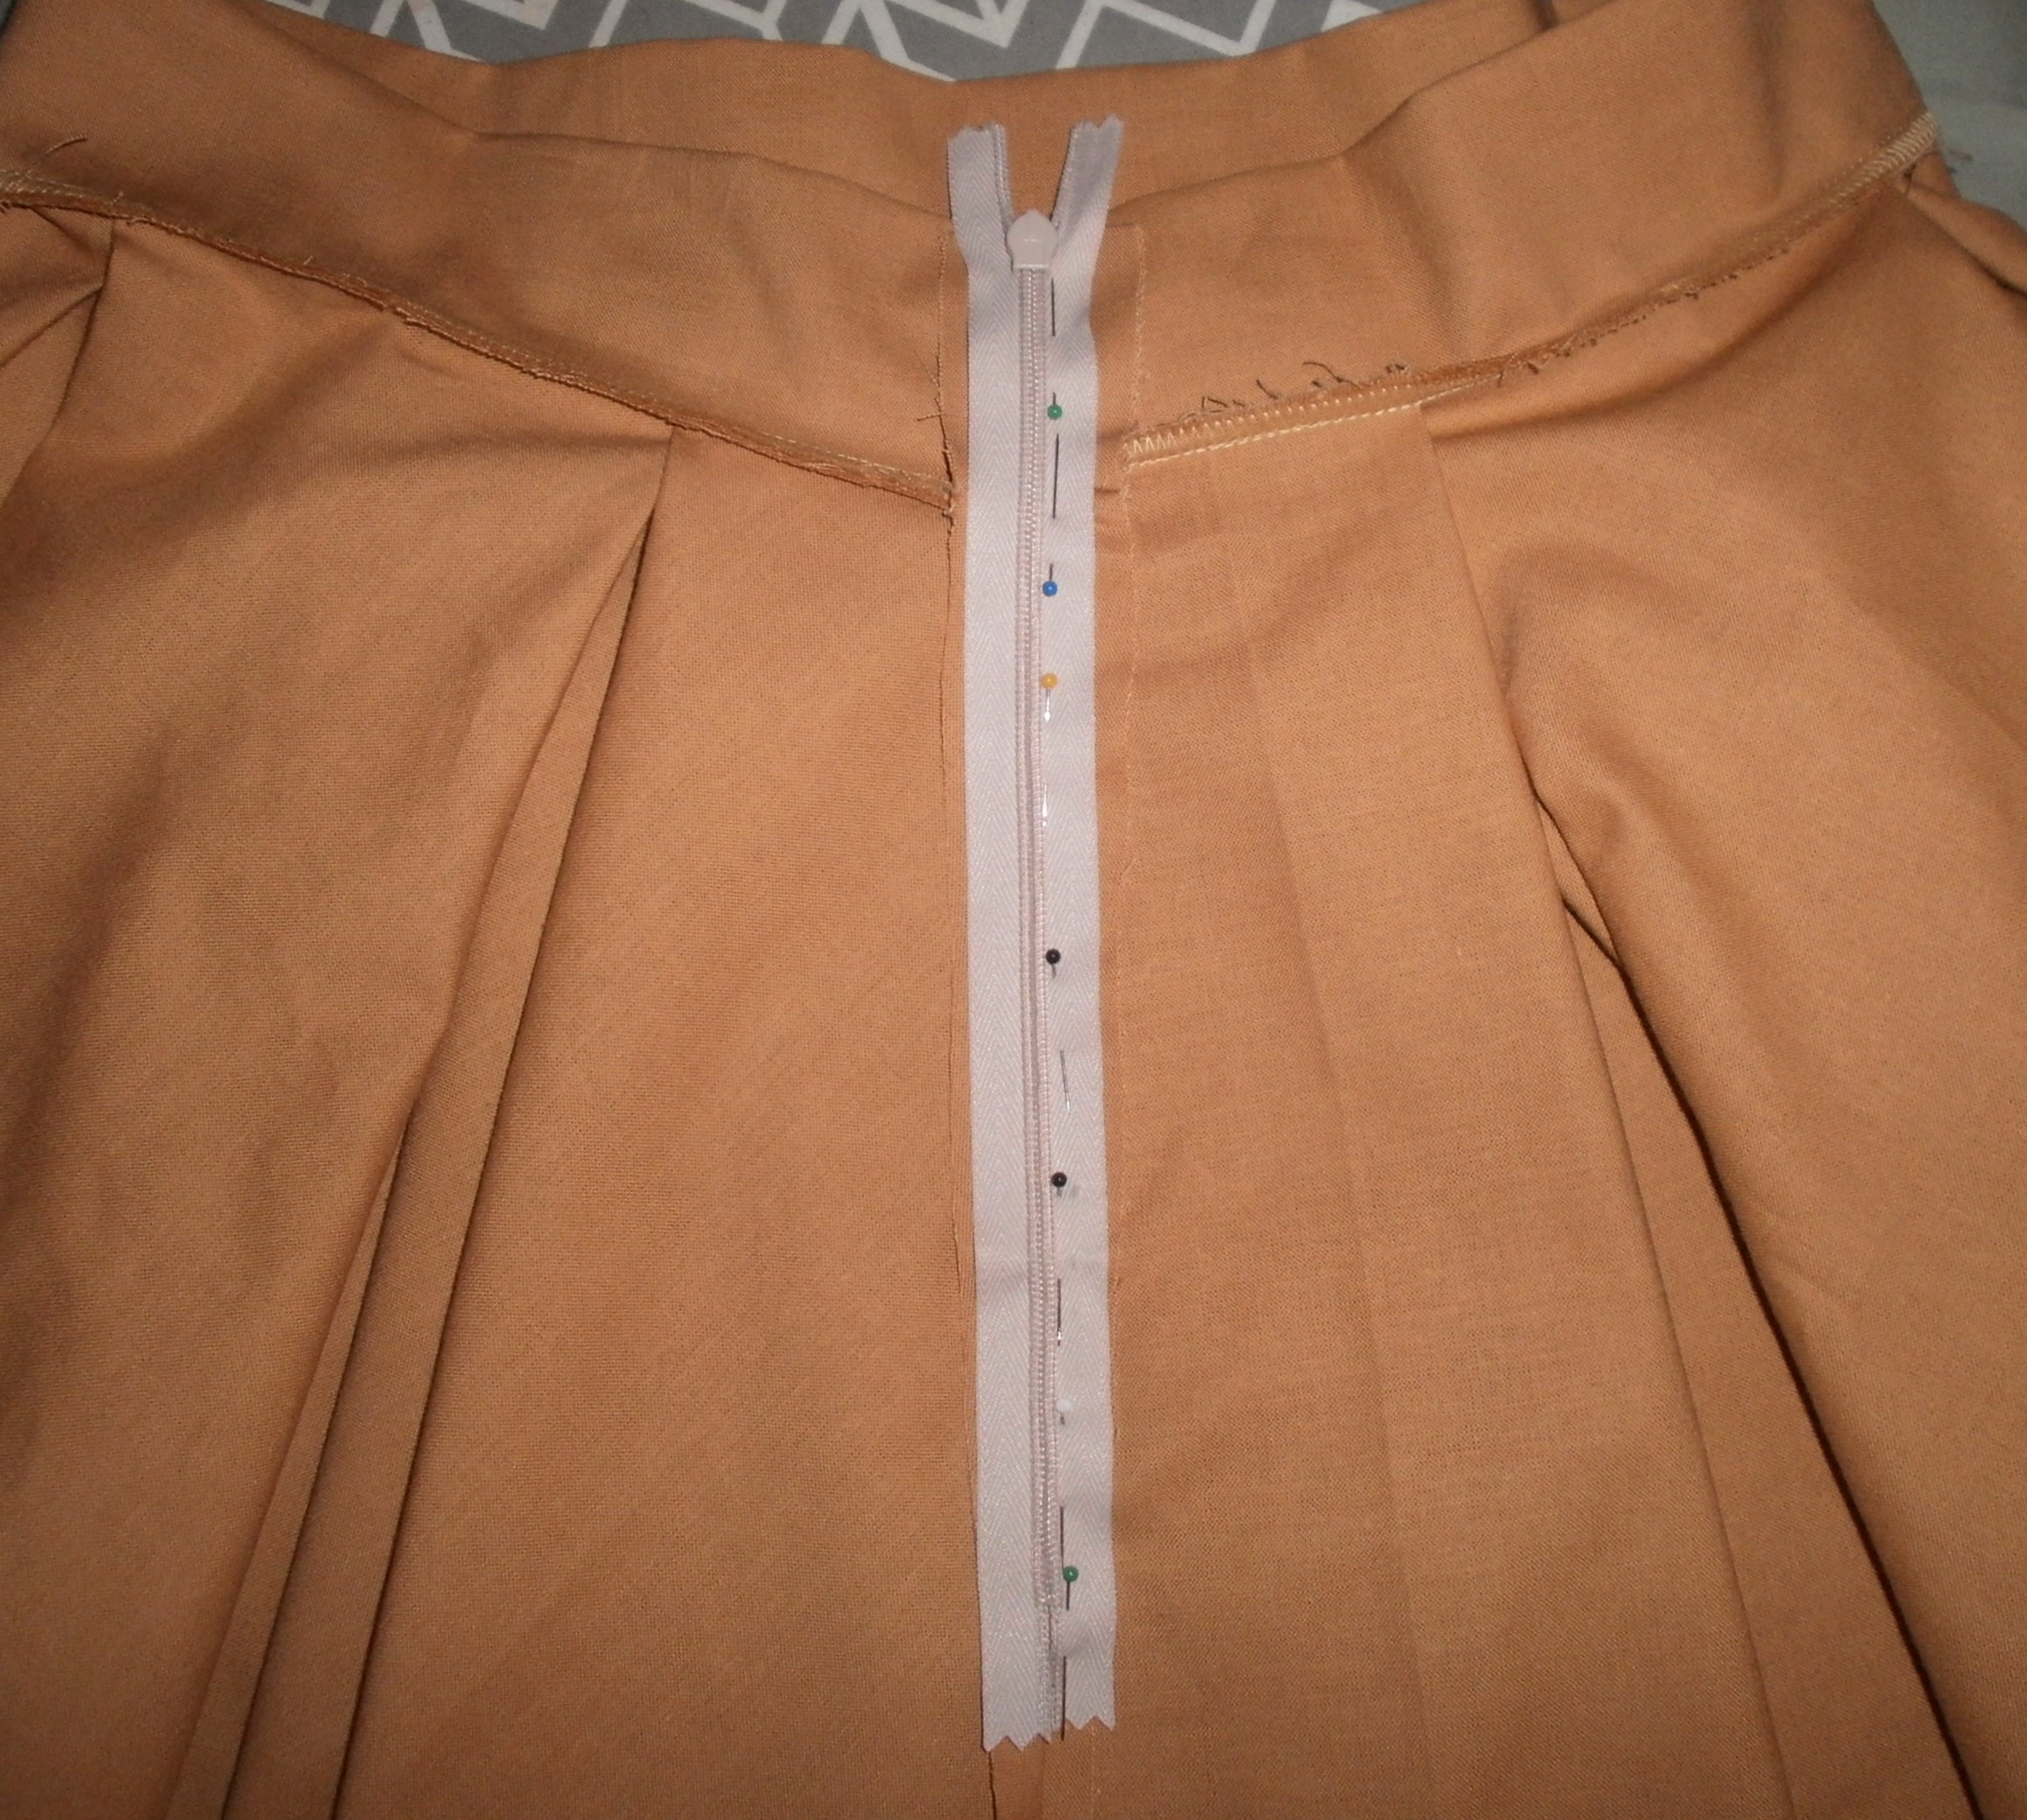 Line up the zipper with the seam and pin in place down the right side only.
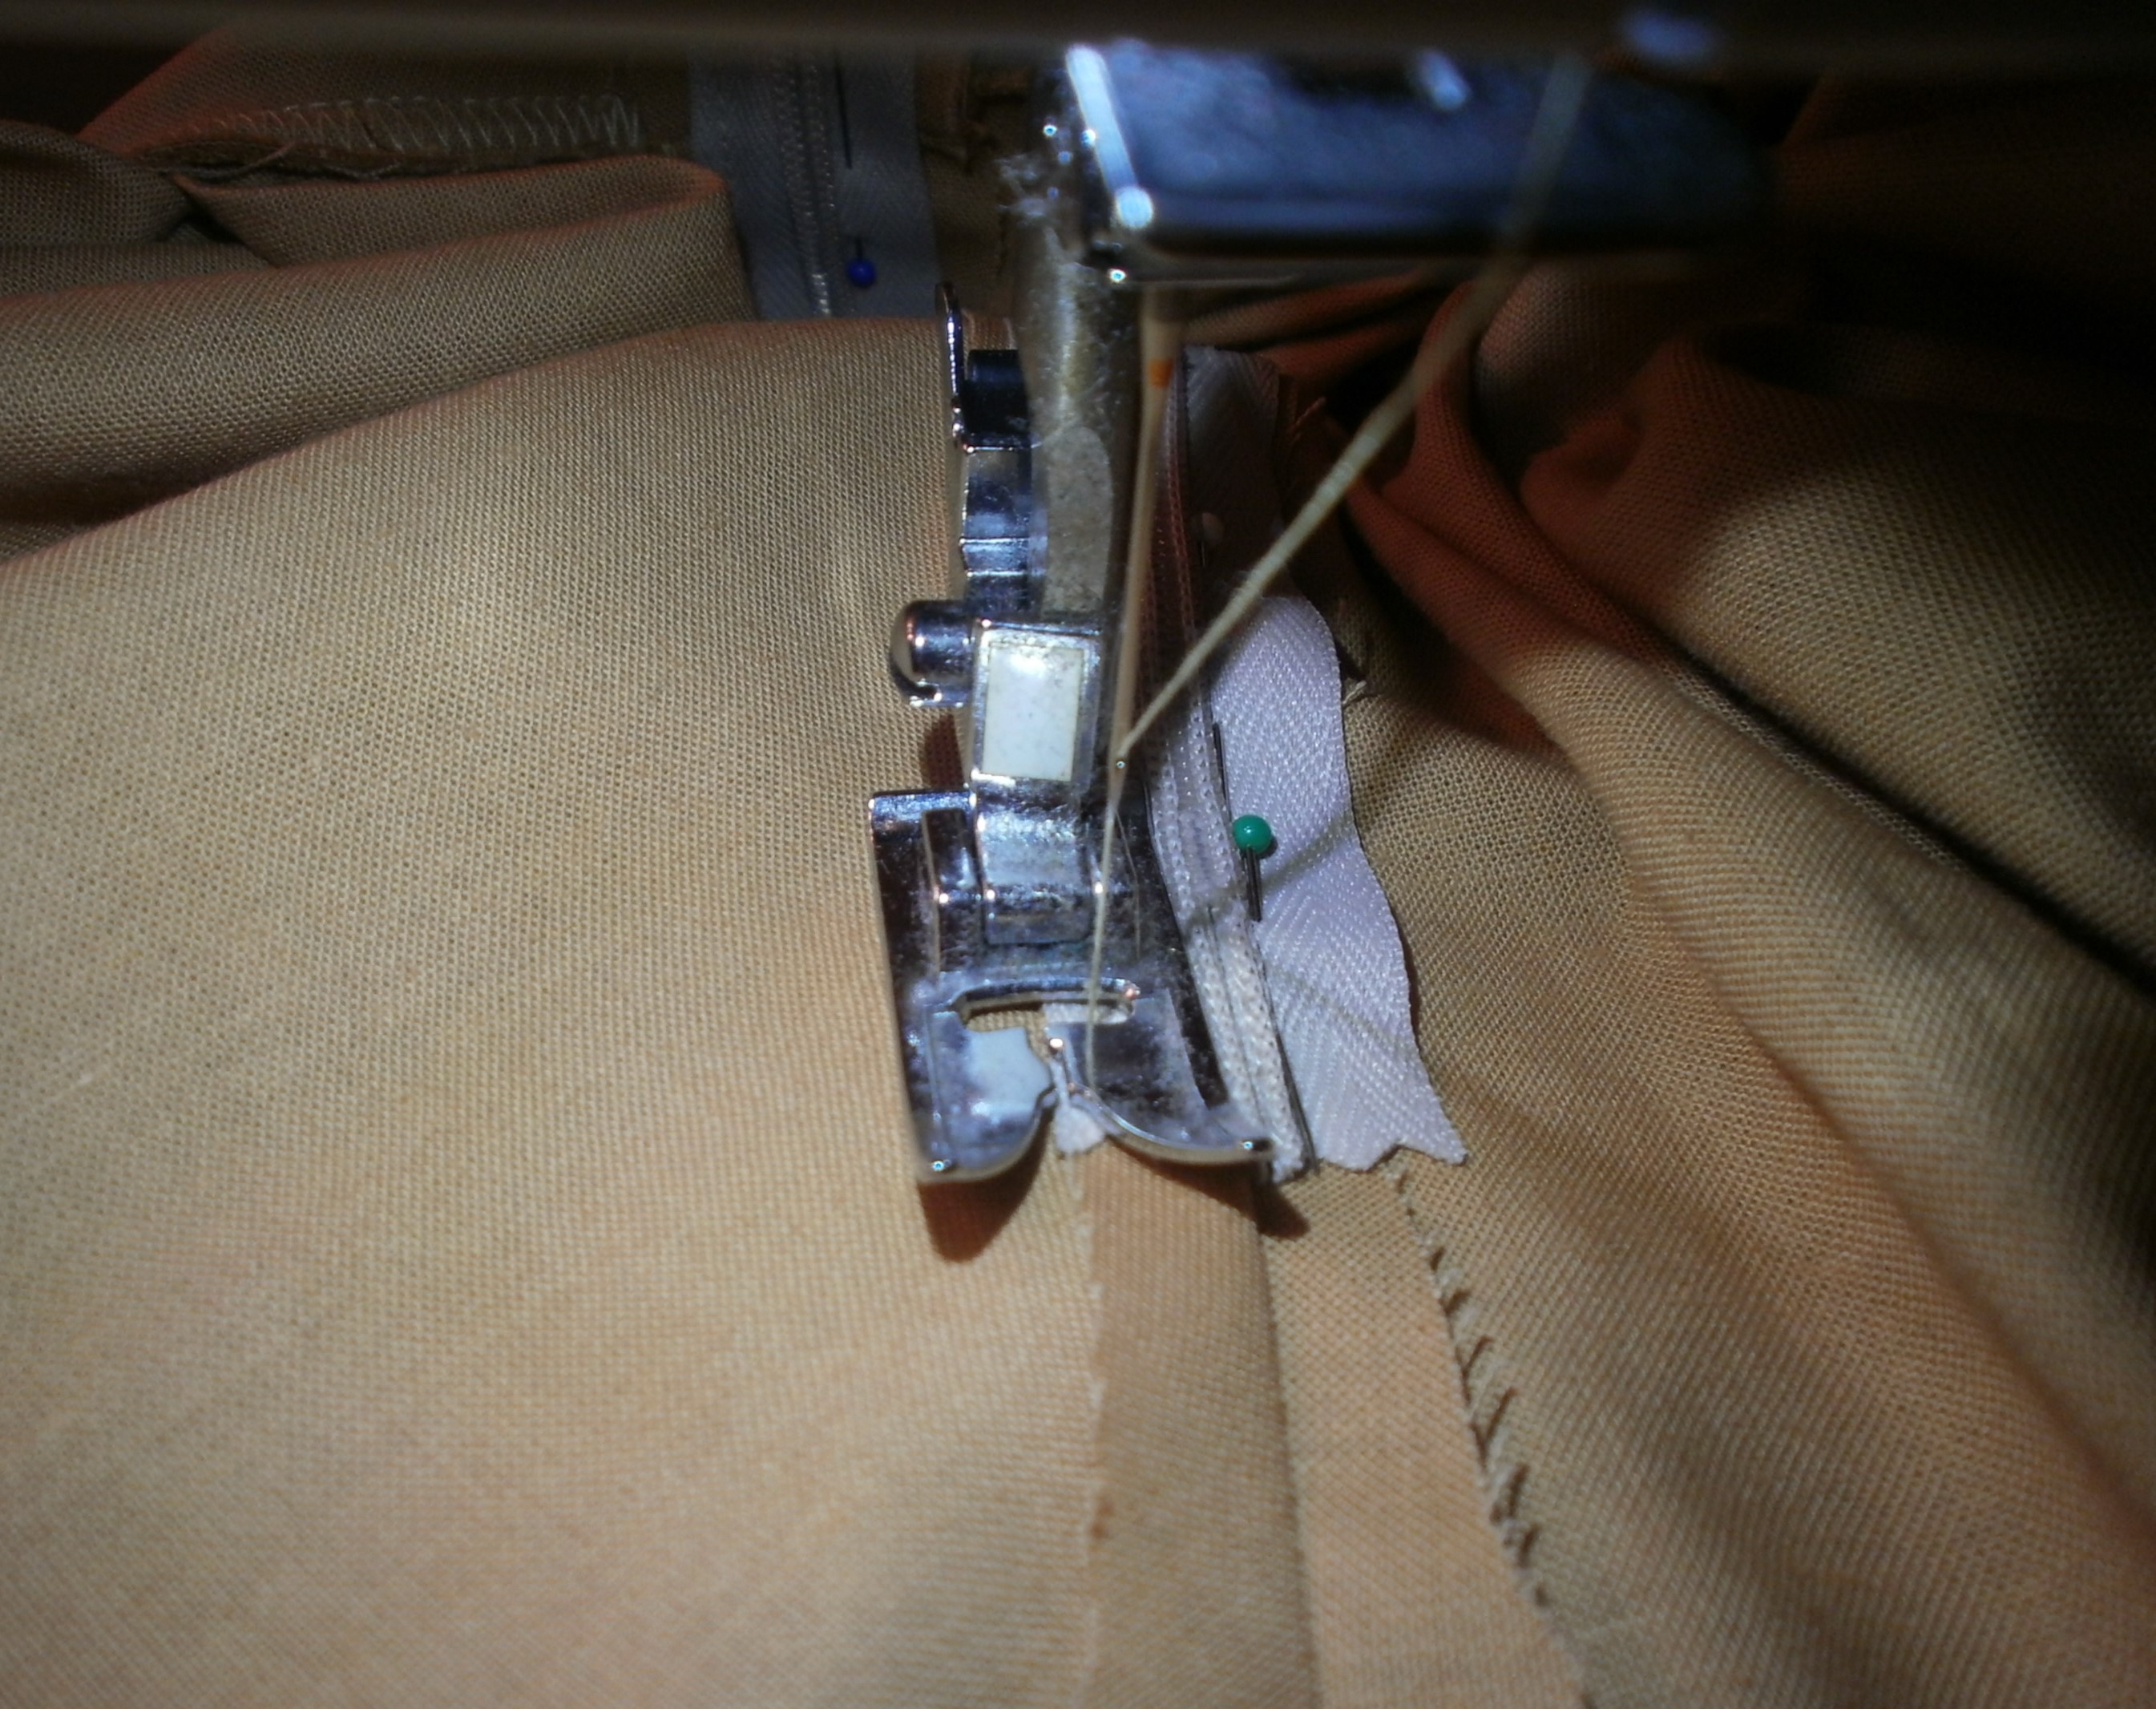
We are going to skip the top of the zipper for now since the pull tab is in the way.
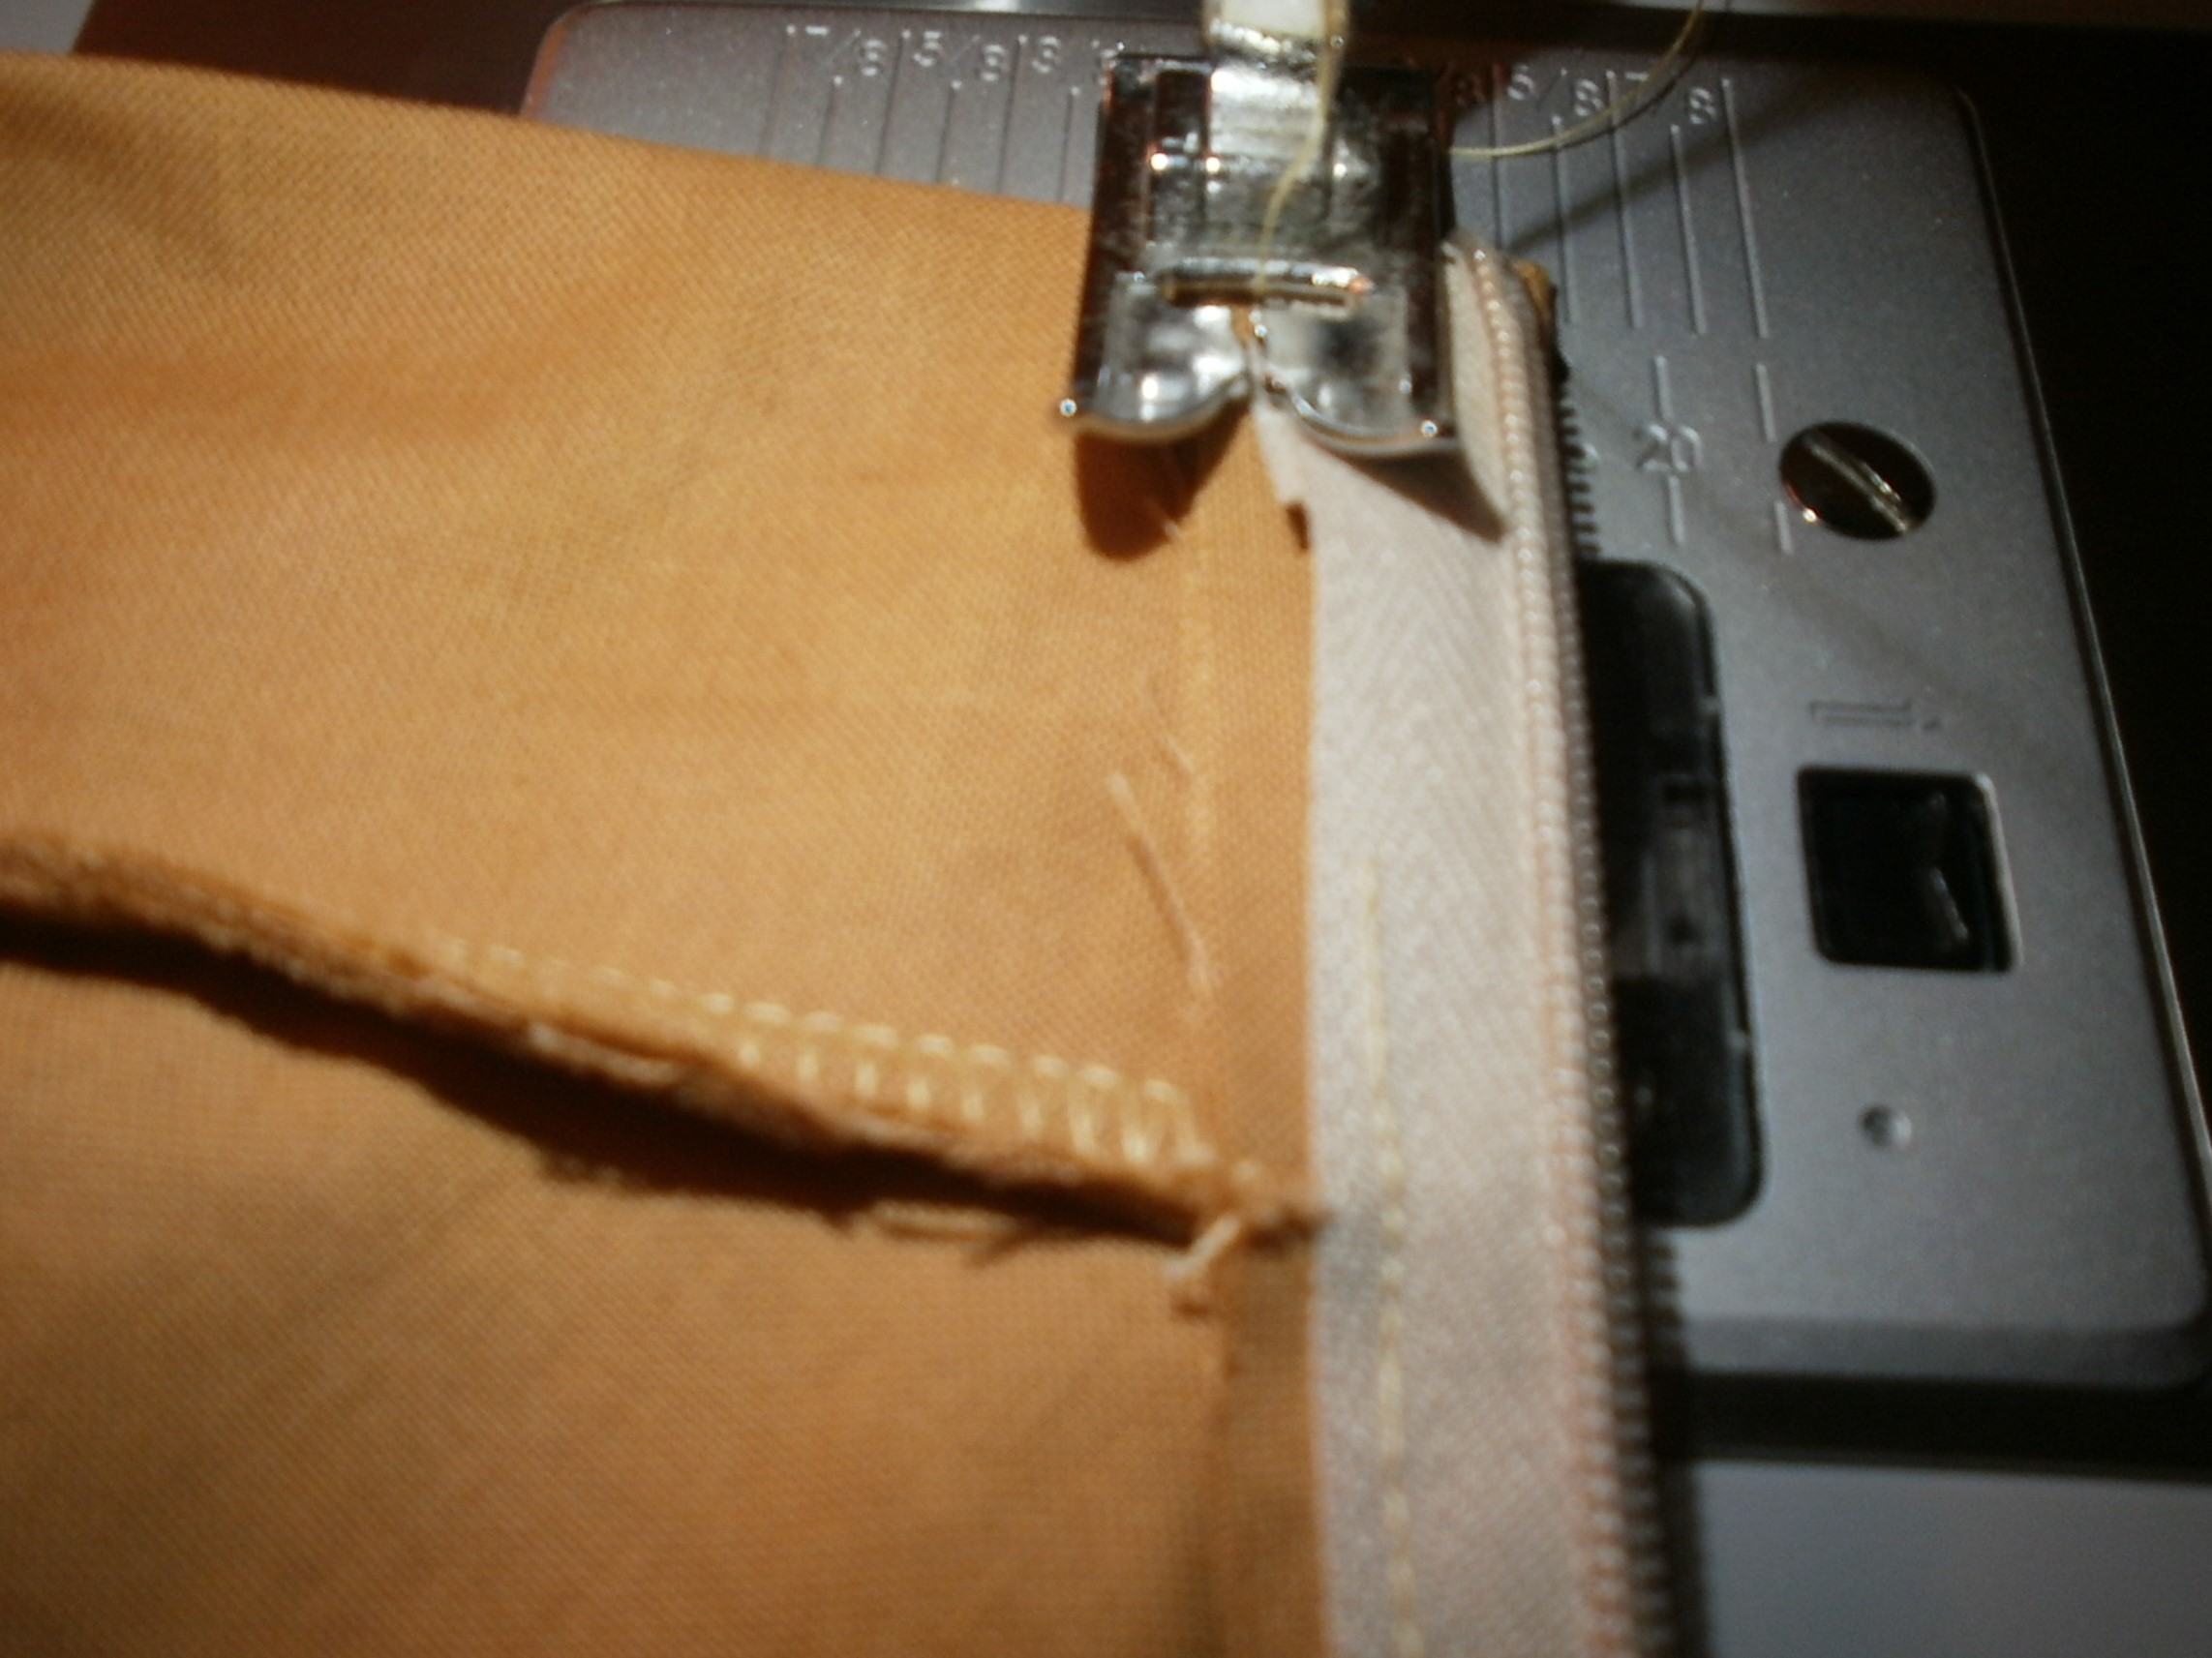
Starting below that point, line it up on your sewing machine with the foot sitting against the teeth of the zipper.
Move the needle setting on your machine all the way to the right.
Sew down the left side of the zipper.
Now turn around and go up the other side, moving the pins out of your way.
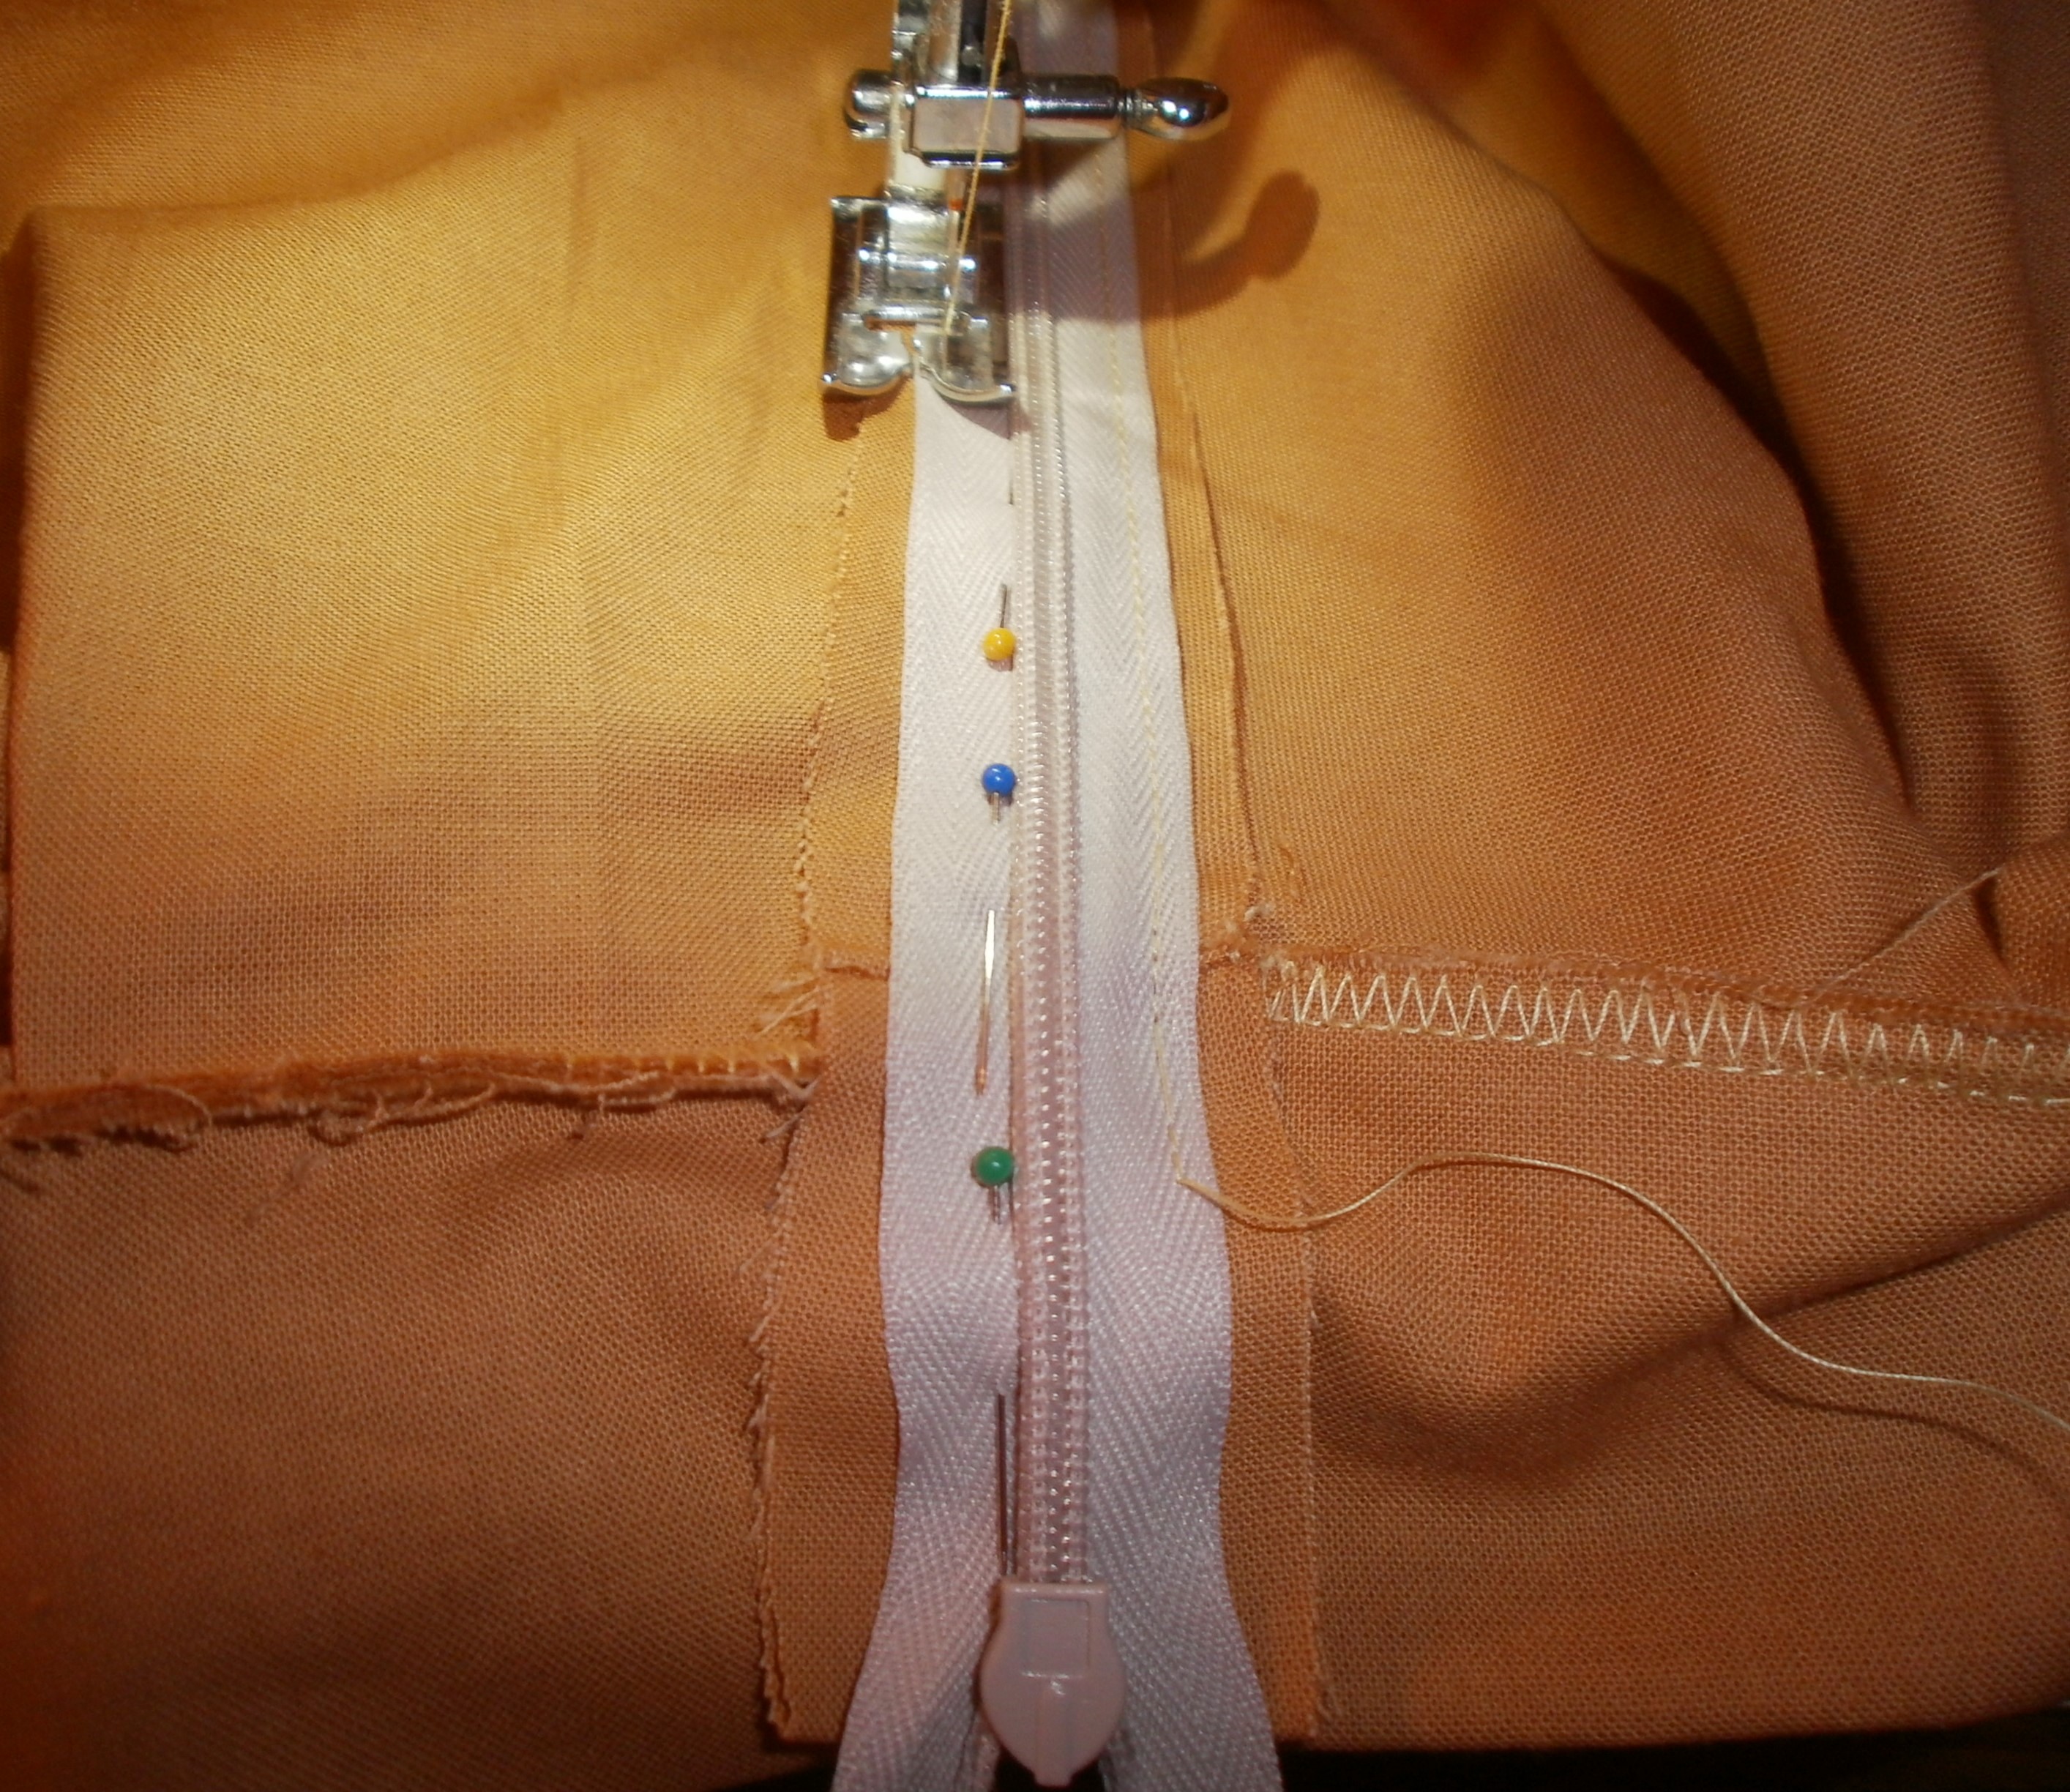
Stop when you get to where the pull tab is in the way.

Remove basting stitches.
Now unzip the zipper so you can finish sewing the top of the zipper.
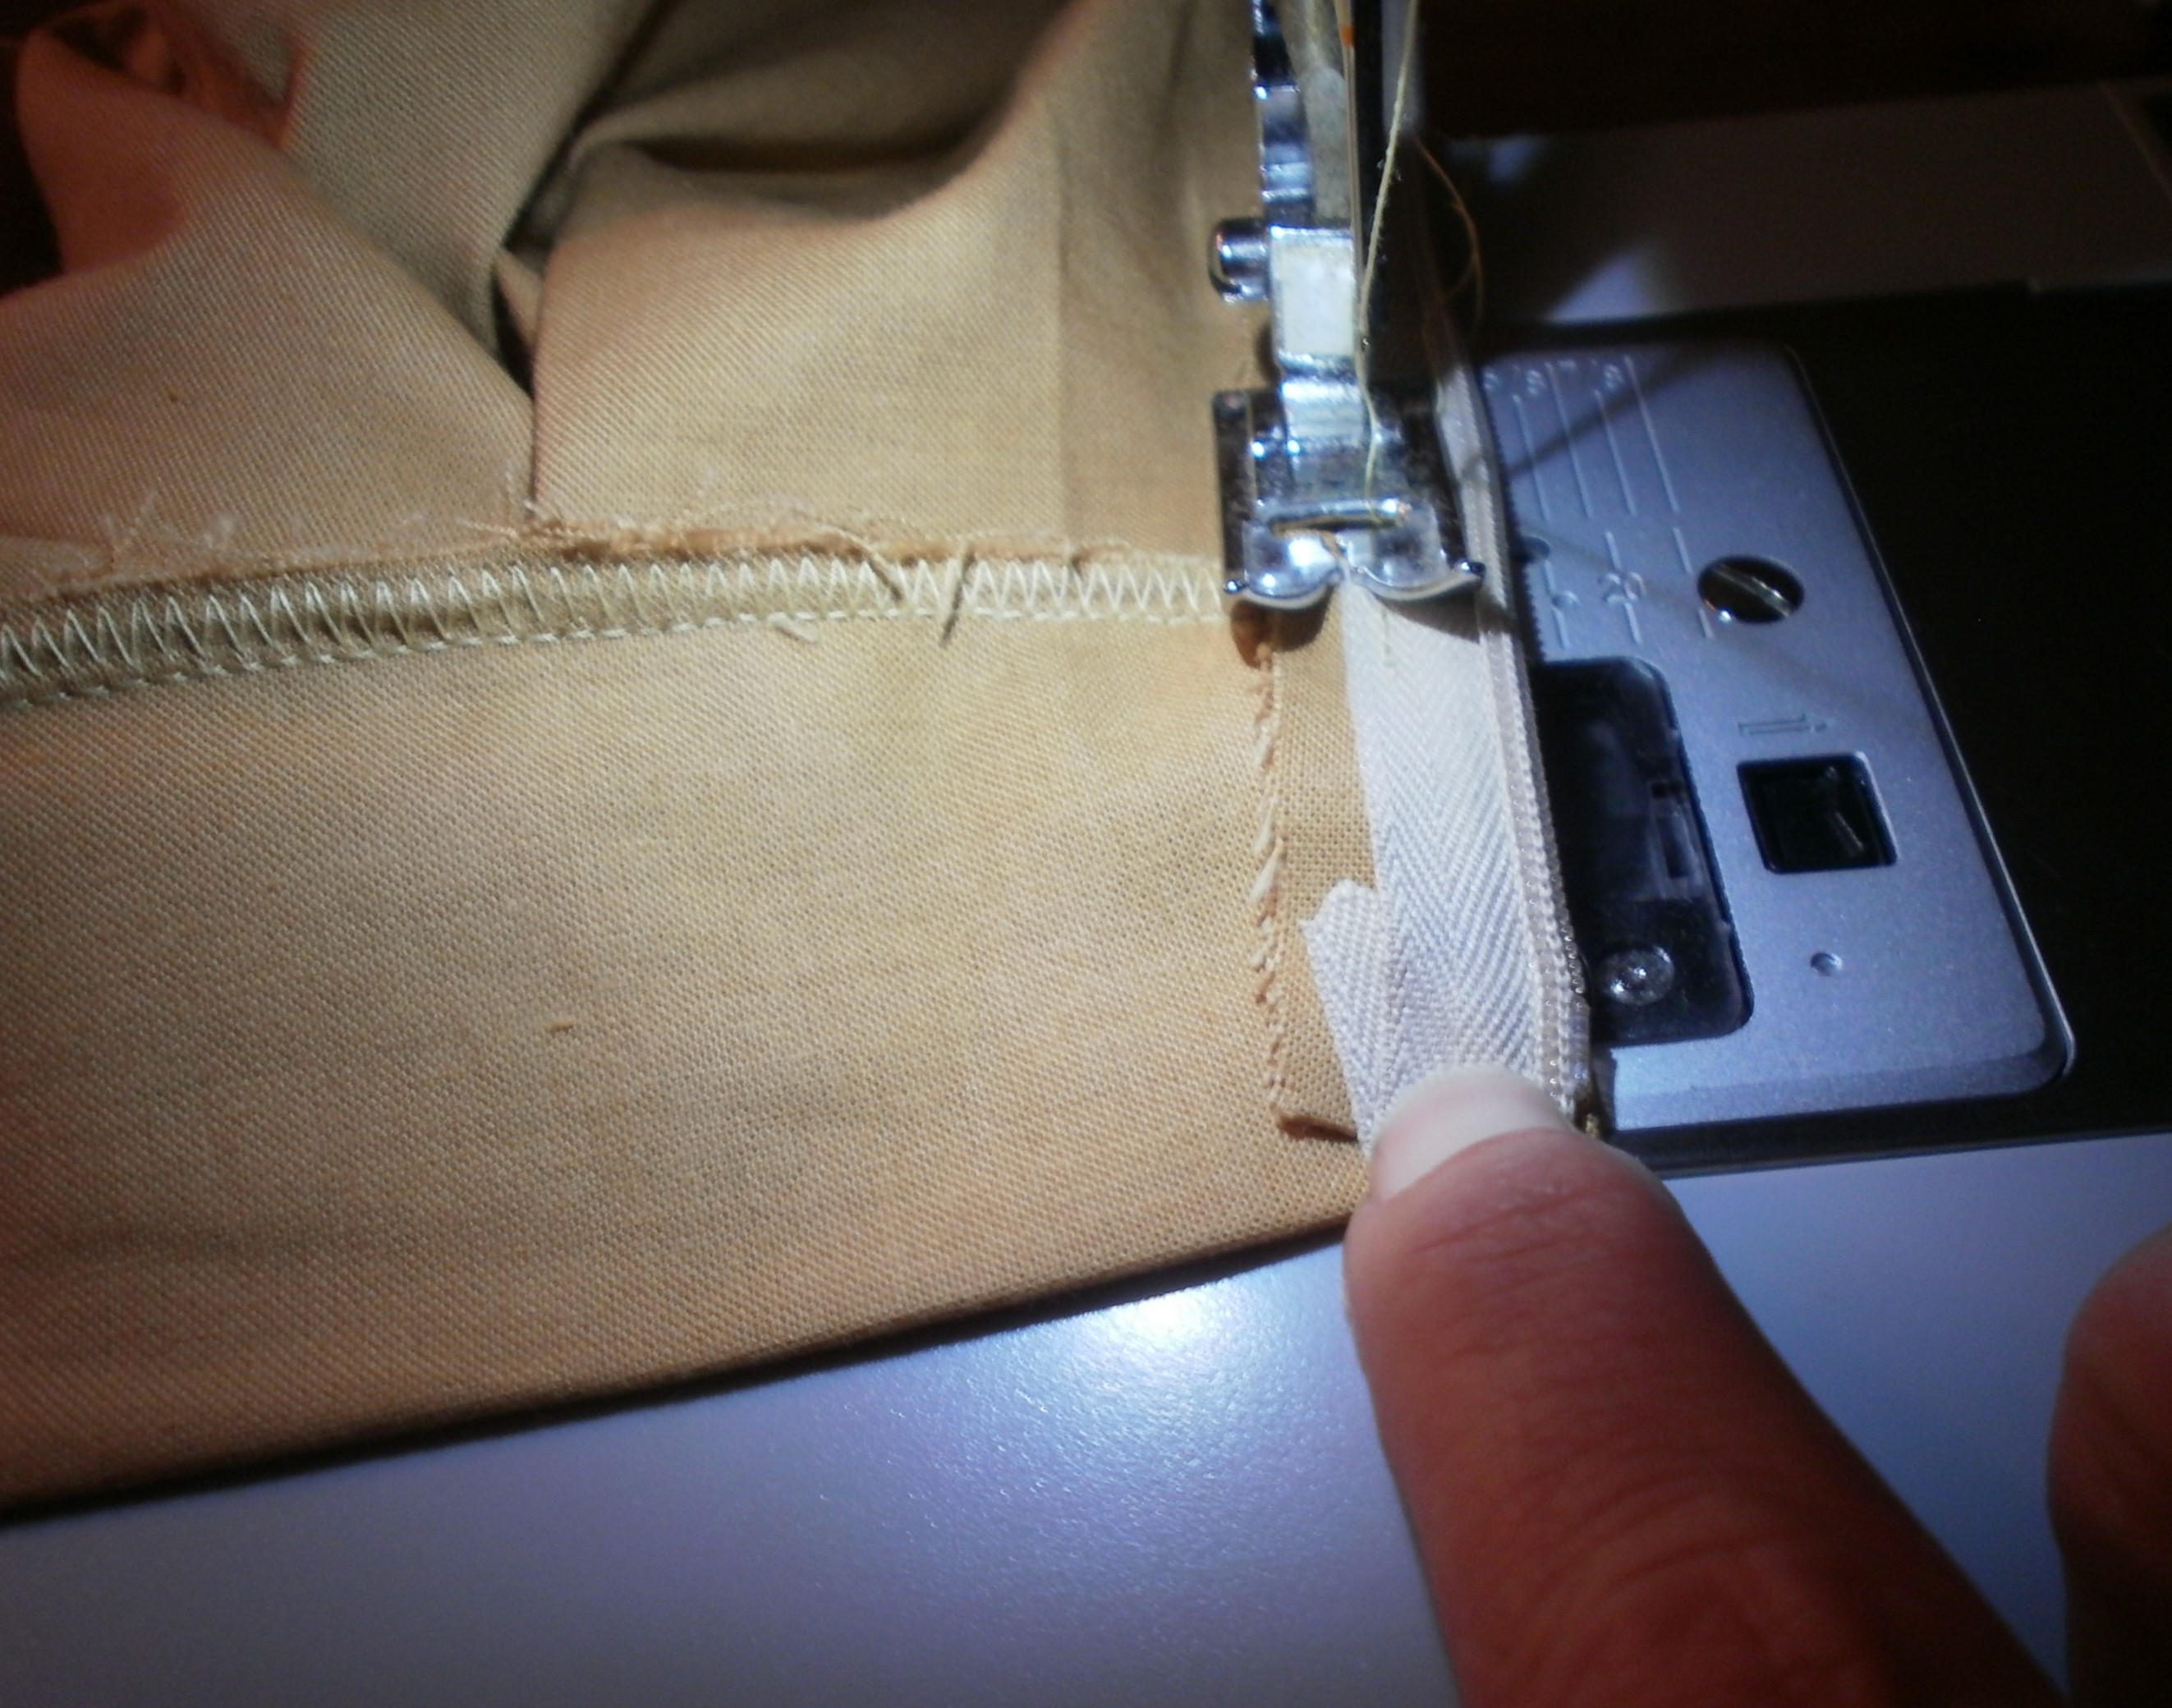
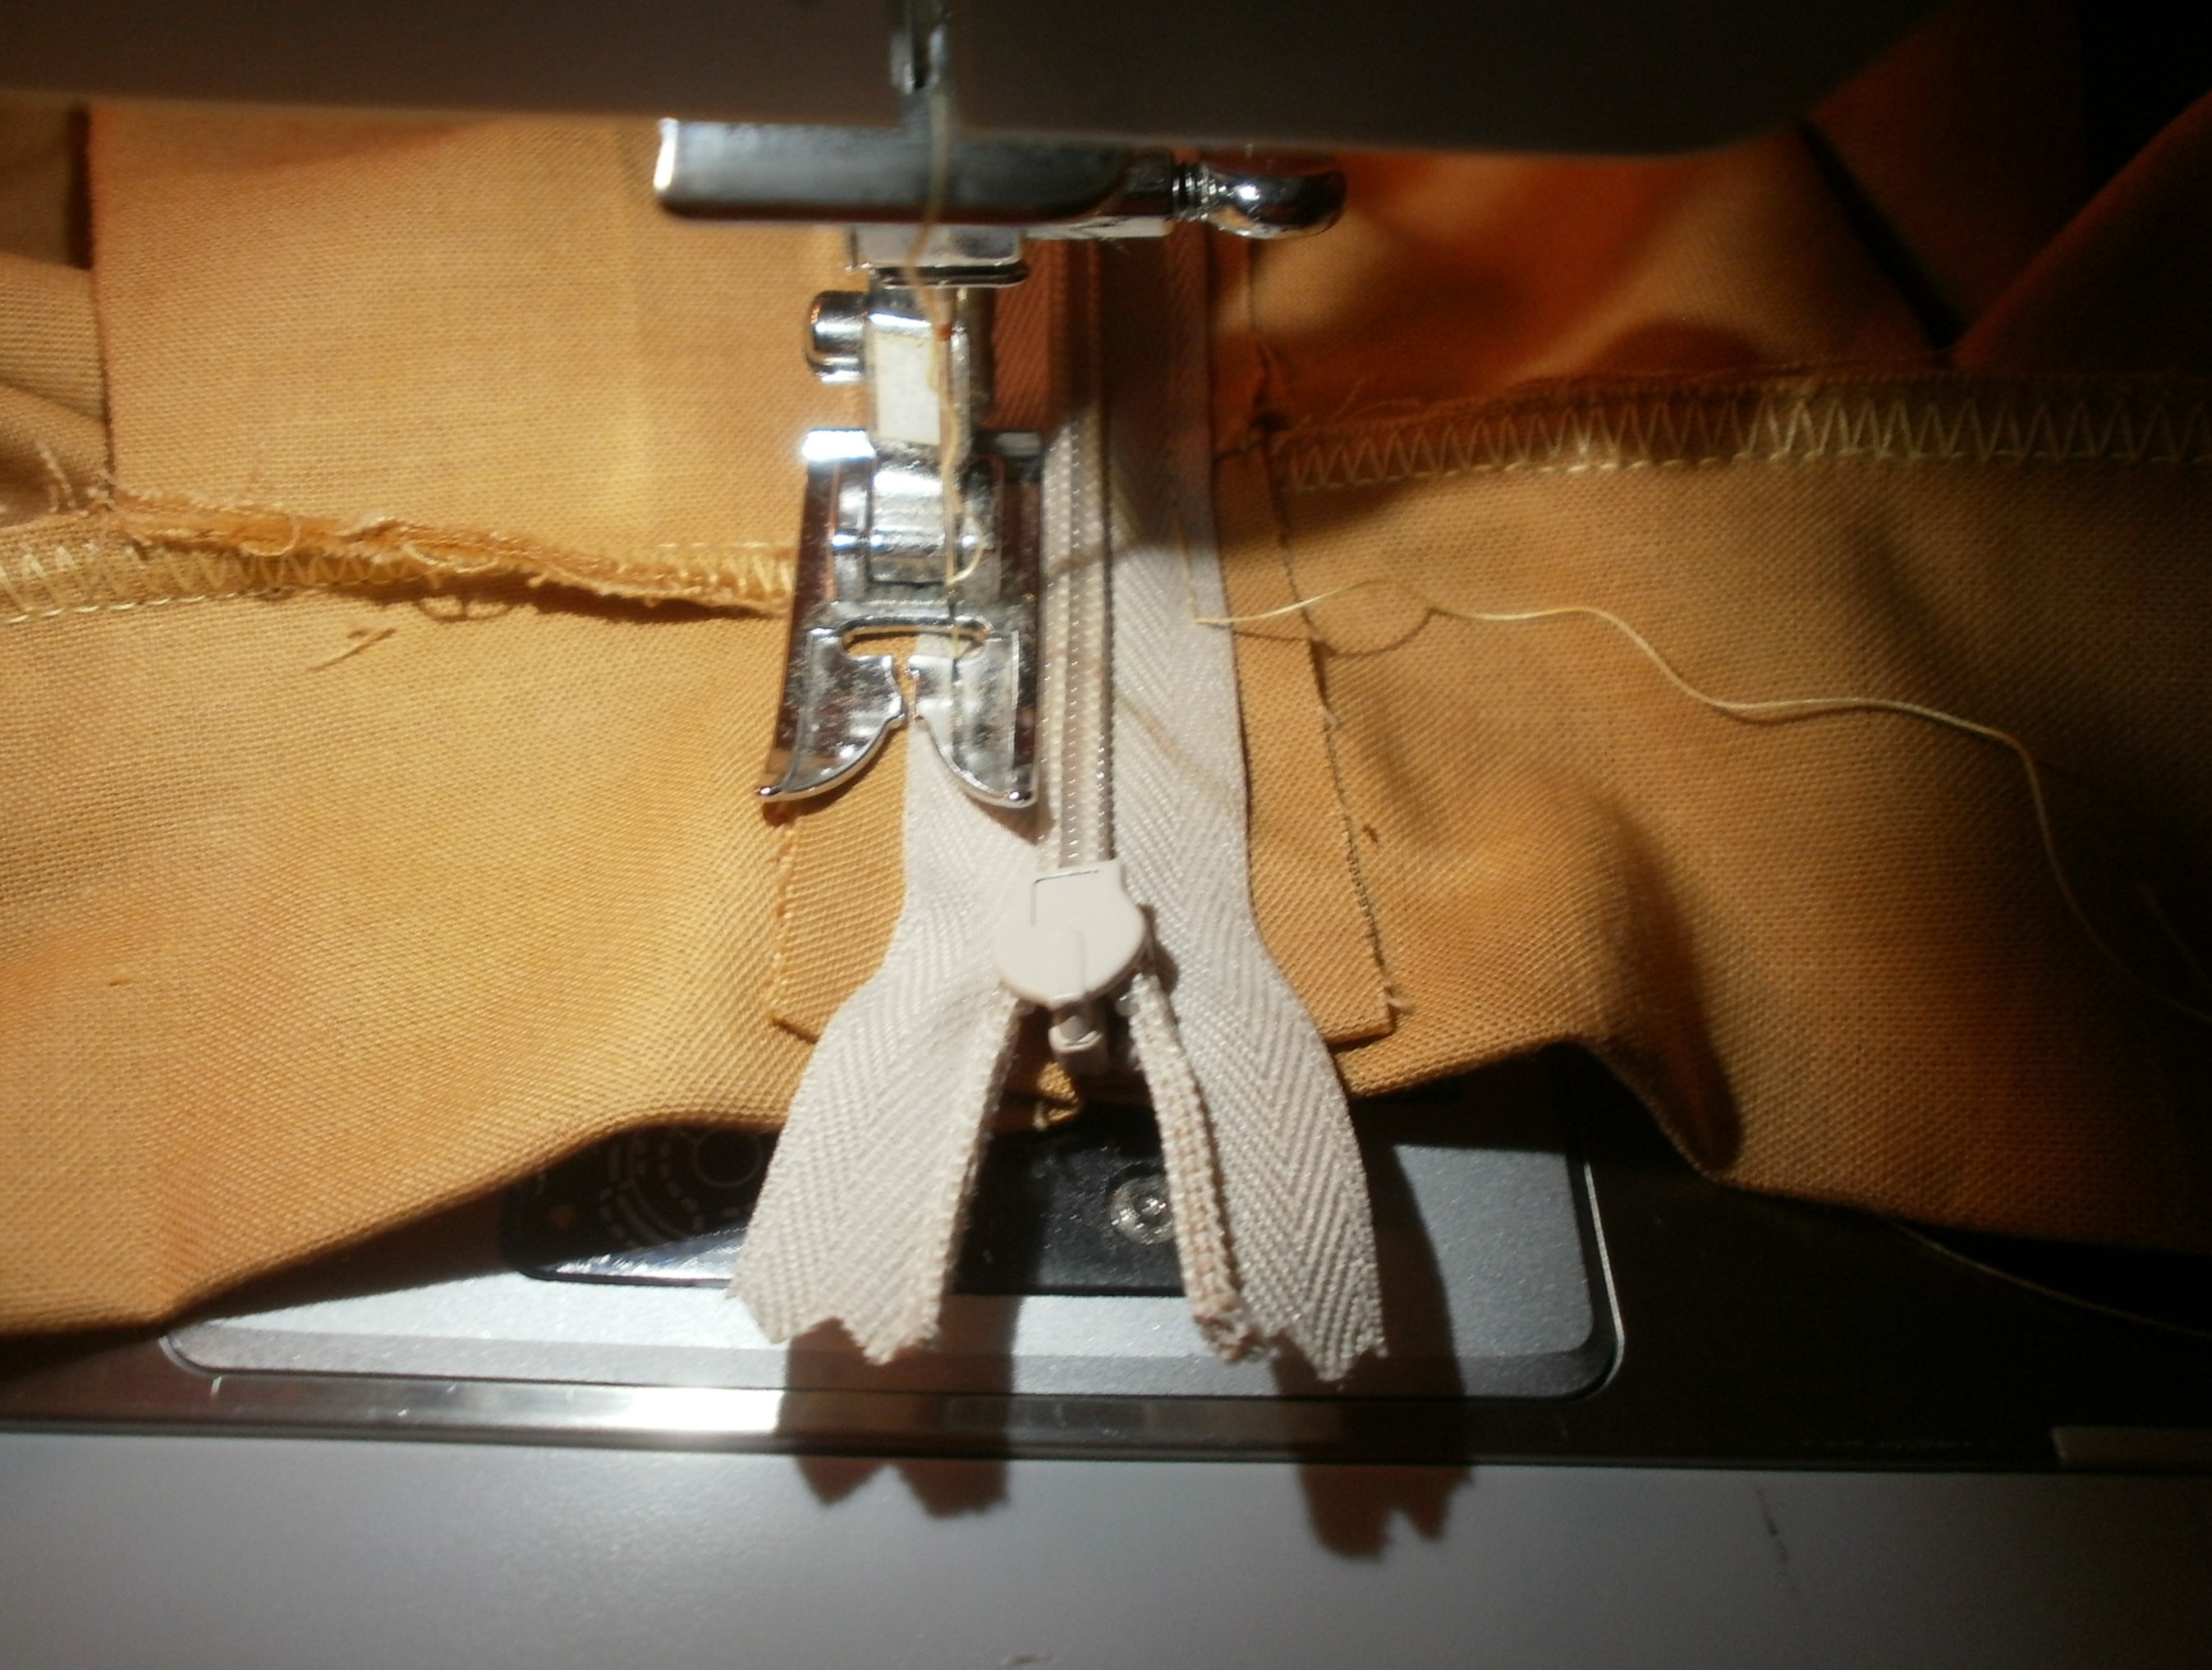
Fold the end of the zipper under, toward your fabric and sew down the left side.
Turn around and sew down the right side, again folding the end of the zipper under.
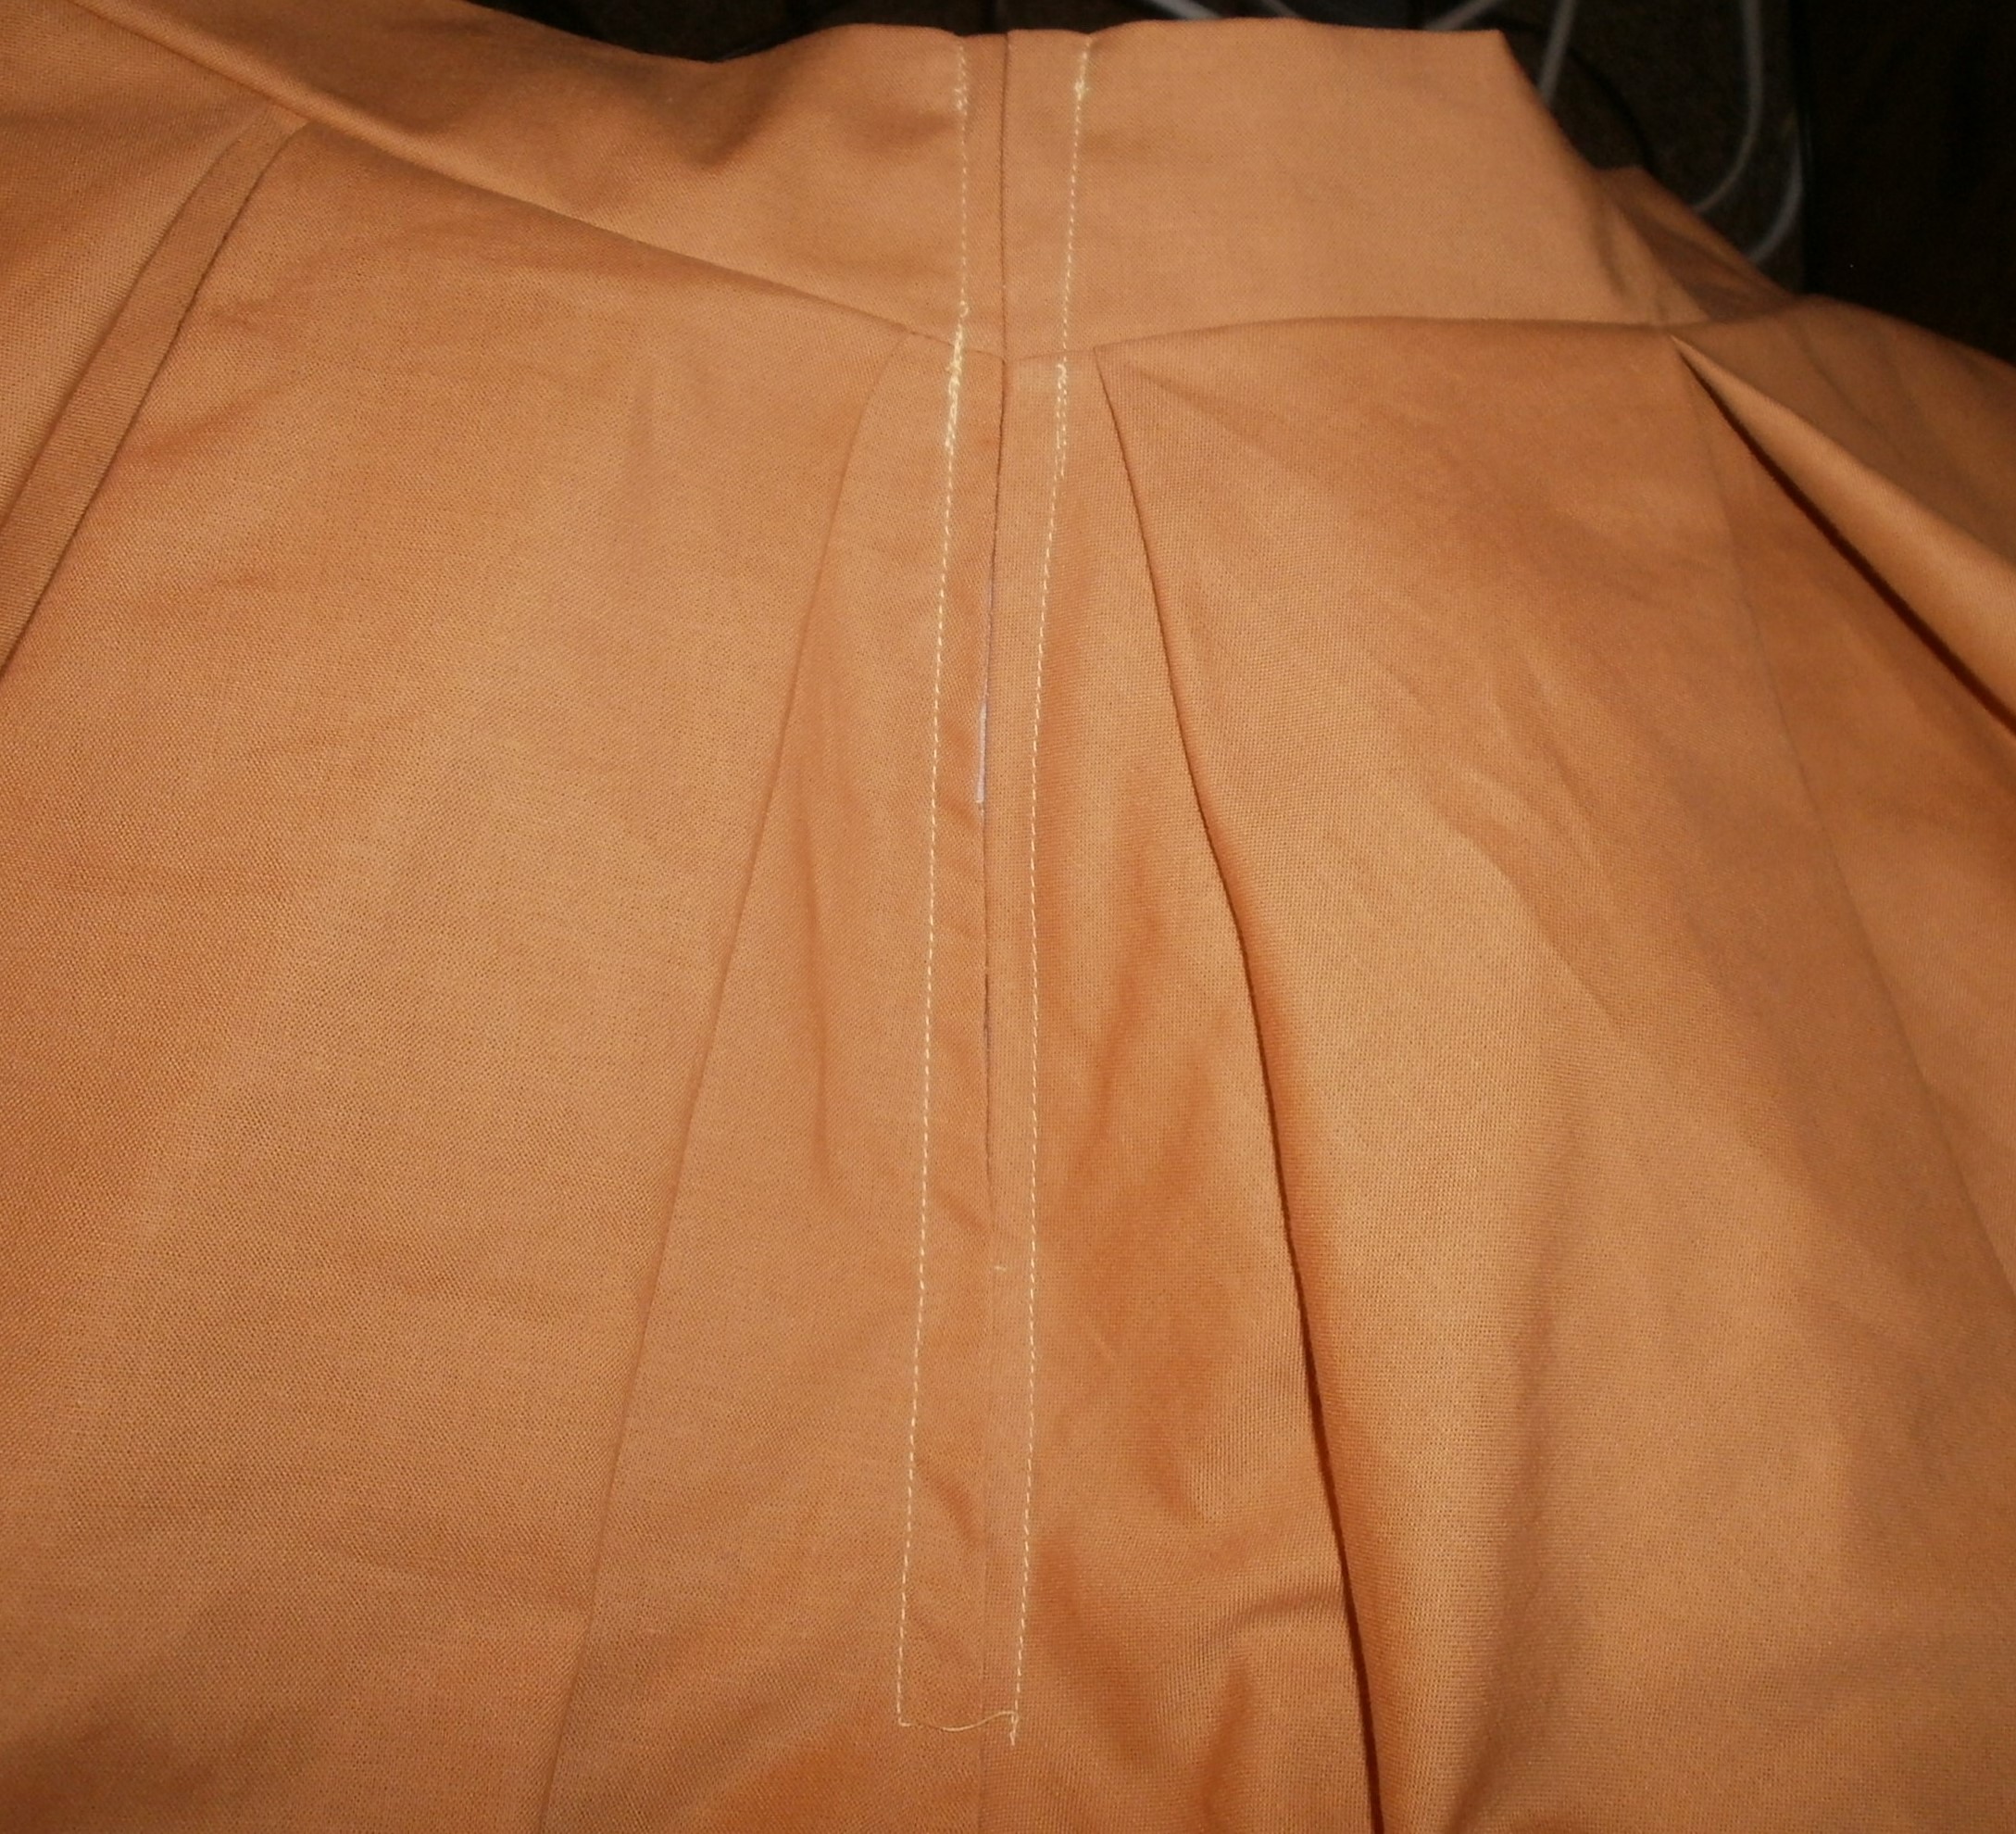 .
.
August 2017: Using Heat Transfer Vinyl
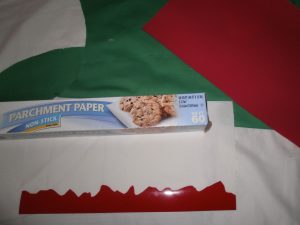
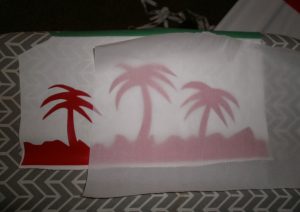

With a layer of parchment paper between your design and the iron, you can get the iron hotter and hold steady in each place longer without damaging anything.


And here is the finished product!